Airkiss Configuration Guide
Introduction#
In this guide we introduce Airkiss method to configure WizFi360.
Airkiss sequence#
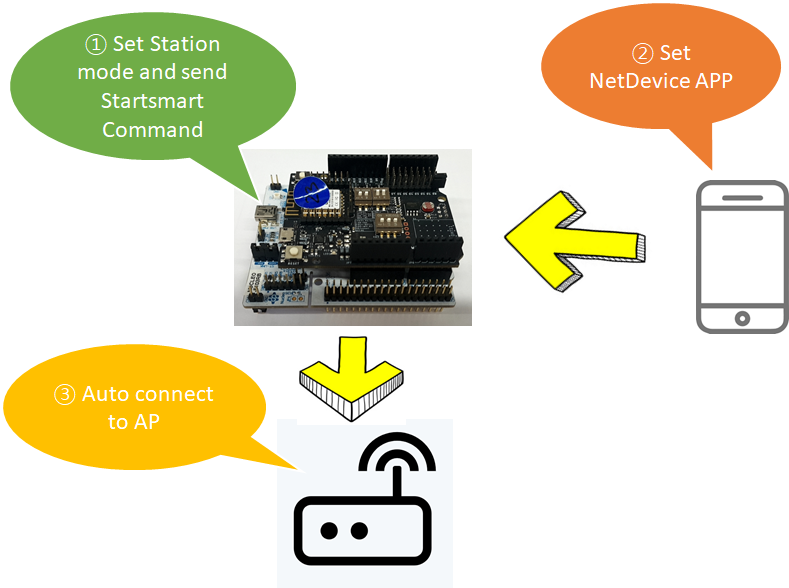
Set module to station mode using AT+CWMODE_DEF=1
Airkiss start using AT+CWSTARTSMART=2
Launch Android app and input WiFi AP' SSID and password.
Check AP connection status
Start WizFi360 Server mode
important
• SmartConfig is only available in the Station mode. (AT+CWMODE_CUR=1)
• The message "smart get wifi info" means that SmartConfig has successfully acquired the AP
information. WizFi360 will try to connect to the target AP.
• The message "smartconfig connected wifi" is printed if the connection is successful. Use command AT+CWSTOPSMART to stop SmartConfig before running other commands. Please make sure that you do not execute other commands during SmartConfig.
• The LED(PB_07) is blinking fast during running Oneshot via Airkiss.
The LED(PB_07) is blinking slowly during running Oneshot via WebServer.• SmartConfig
Android Application#
Connect with AirKiss#
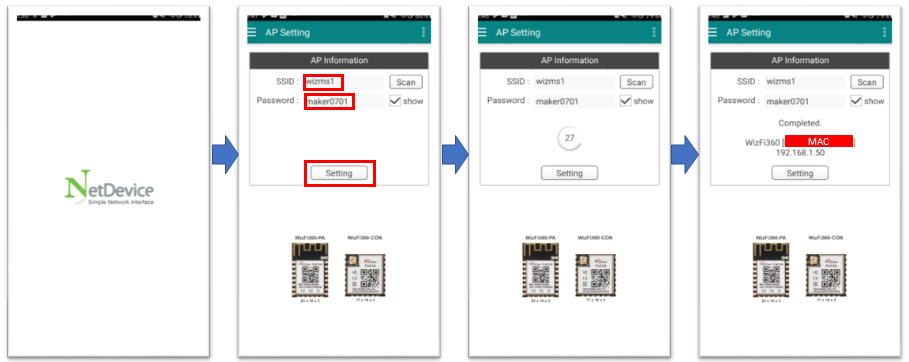
Prior configuring WizFi360 module it is necessary to set settings in Android application. This procedure is simple and contains following steps:
- Launch application on smartphone which is connected to AP.
- Input SSID and password, then press "Setting" button.
- Wait while WizFi360 is connected to AP.
- Upon completion app will display MAC and IP addresses.
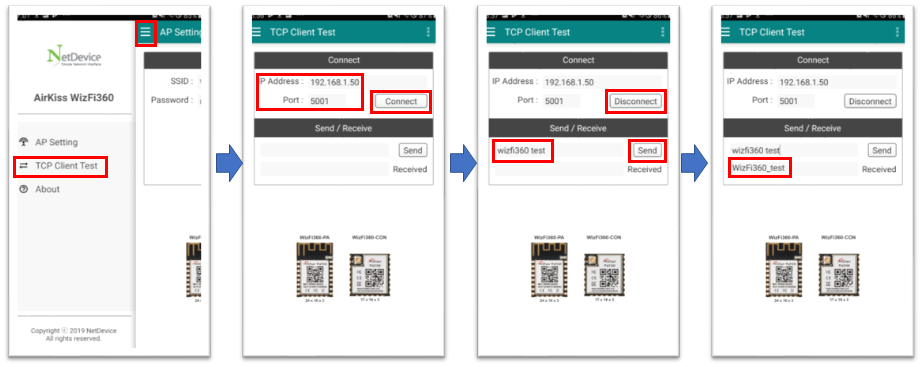
TCP Client Test#
It is possible to test TCP connection between WizFi360 and smartphone, where smartphone will be TCP client and WizFi360 will be used as server.
To conduct test follow below procedures:
- Press "Menu" button on top left side of application. Then press "TCP Client Test"
- Check IP address and port, then click "Connect" button. When application is connected, button will be changed to "Disconnect".
- Input a message and press "Send" button.
- App will display message on the screen when it is received from server.