Location Tracker with WizFi360
시작하기 전에#
Hardware Requirement#
- Arduino Mega 2560 board
- Desktop and/or laptop computer
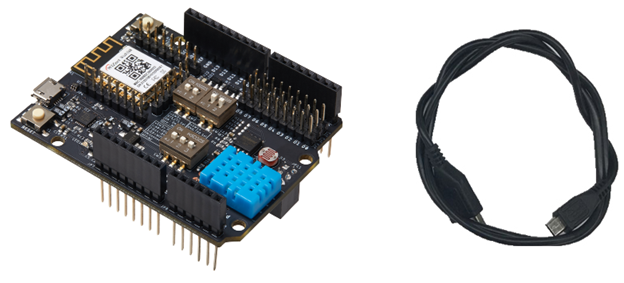
- USB 케이블
- WizFi360-EVB-Shield
Software Requirement#
- Preferred Serial Terminal (TeraTerm, YAT, etc.)
- Arduino IDE
- ArduinoJson library (version 6.14.1 was used in this guide )
소개#
This guide was inspired by post on [https://www.instructables.com].
Using unwiredlabs geolocation API it is possible to get location coordinates without GPS and even display.
디바이스 준비#
하드웨어 설정#
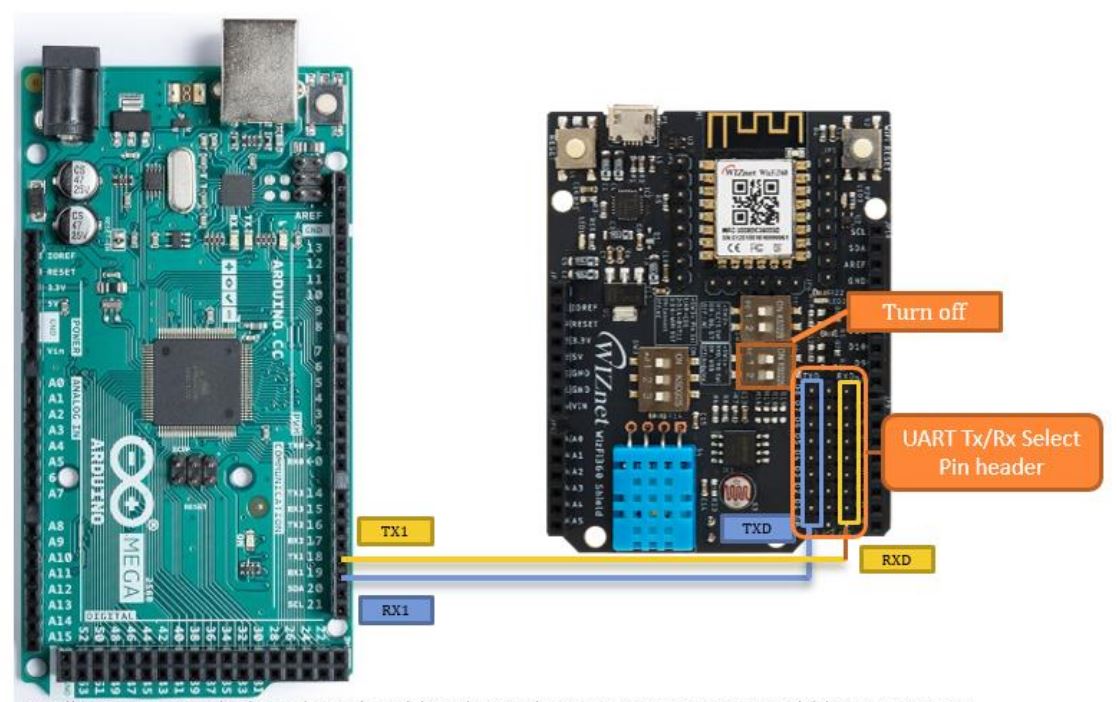
이 문서에서는 Arduino Mega2560 과 WizFi360-EVB-Shield 를 사용합니다. Arduino Code 에서 UART1 을 사용하여 WizFi360-EVB-Shield 와 통신하기 위해, Arduino 의 TX1, RX1 Pin 과 WizFi360-EVB-Shield 의 RXD, TXD pin 을 연결합니다. WizFi360-EVB-Shield 에서 RXD/TXD Selector 를 OFF 로 변경하여 USB 가 아닌 Pin 을 통해 UART 통신을 하도록 합니다.
디바이스 연결#
하드웨어 설정 후 USB 커넥터를 이용하여 Arduino Mega2560 Rev3 보드와 PC를 연결합니다. PC 운영체제 장치 관리자에서 장치와 연결된 COM 포트를 확인할 수 있습니다.
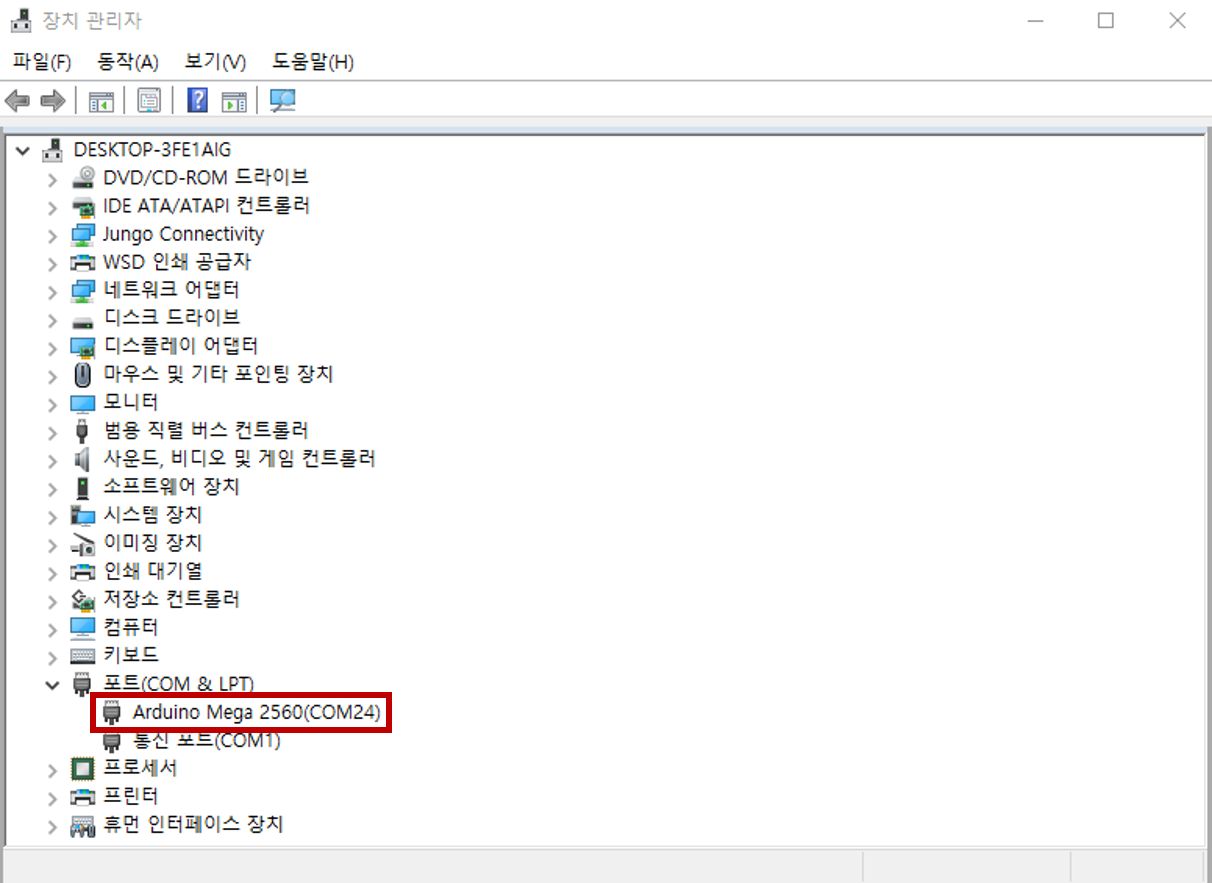
Arduino IDE를 정상적으로 설치하면, 위와 같이 장치 관리자에서 COM 포트를 확인할 수 있습니다.
Unwired Labs Geolocation API#
As mentioned before, in this guide we are going to use Unwired Labs (https://www.unwiredlabs.com/) Geolocation API. Please go to the website and sign up. On sign up page, fill in your name, email and use case. Select accountt type. For this guide free version was used, however please consider that there is limit for daily usage.
Please check your email with API token. Please copy it as it will be necessary for the code below.
동작 예제#
Arduino 예제 코드 다운로드#
다음 링크에서 Arduino 예제 코드를 다운로드한 후, ino 확장자의 프로젝트 파일을 실행 시킵니다.
예제는 다음 경로에 위치하고 있는 Project를 참고 바랍니다.
samples/Wi-Fi/Arduino_Azure_Atcmd_Wizfi360
Modify parameters#
tip
Fill in your own WiFi/hotspot credentials. Also paste the API token that was received in email.
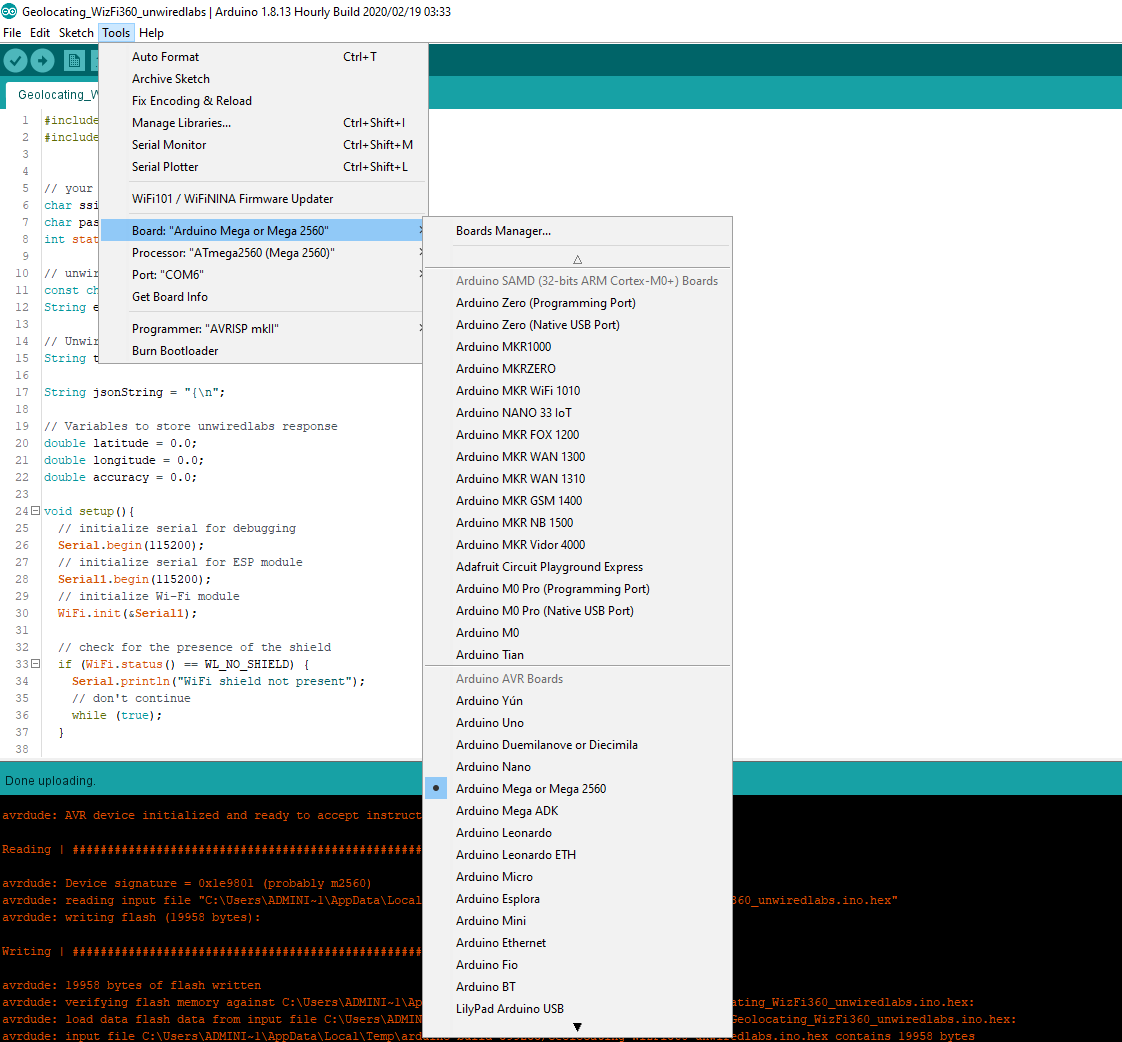
다음 그림과 같이 Arduino Mega2560 보드와 포트를 선택하고, 컴파일을 수행합니다.
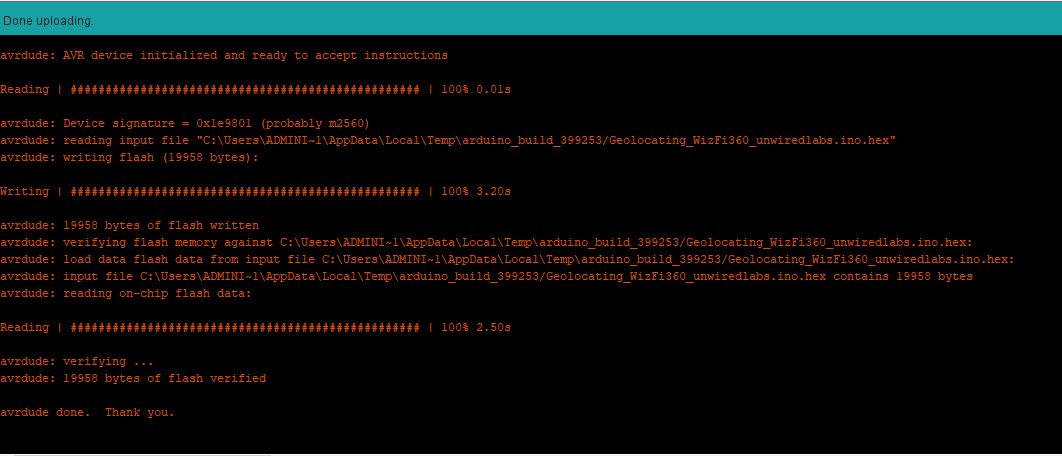
컴파일이 완료 되면 다음과 같이 업로드를 수행하여 최종적으로 보드에 업로드를 수행 합니다. 업로드가 정상적으로 완료되면 'avrdude done. Thank you.' 메시지를 확인 할 수 있습니다.
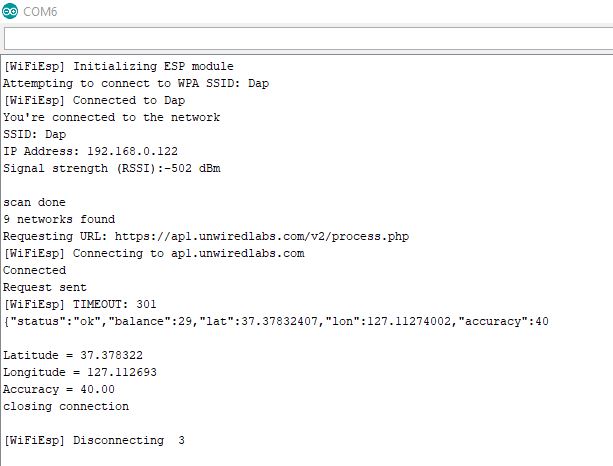
업로드를 완료한 후, 시리얼 모니터를 이용하여 정상적으로 Arduino Mega2560 보드에 업로드 되었는지 확인할 수 있습니다.
5. 동작 예제 결과#
- After uploading code to Arduino board results can be checked on serial monitor.
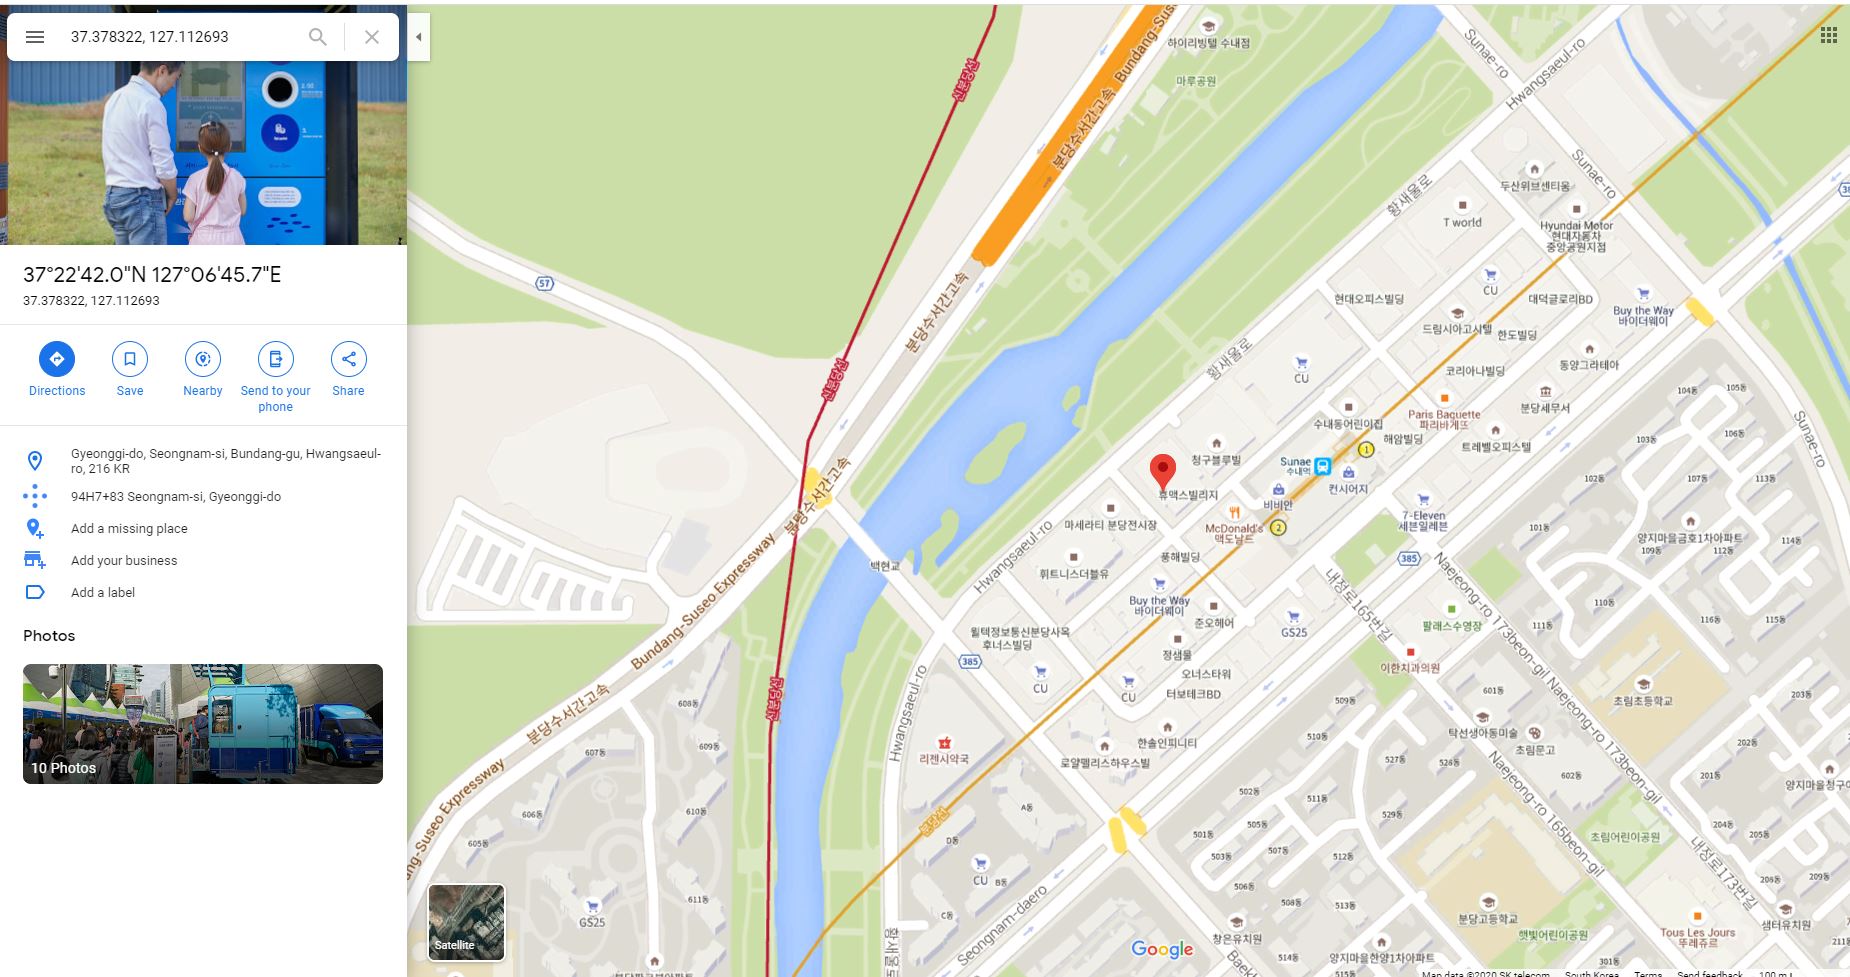
- Google Maps can be used to verify location coordinates.
다음 단계#
In next guide we will connect WizFi360 with Google Location API.