Connect to Azure IoT Hub using WizFi360 MQTT AT Command
Getting started#
Login to Azure Portal.
※ In this guide we will procedd with free account. To learn how to create IoT Hub please refer to Azure Cloud Service Introduction.
Introduction#
It is possible to connect to Microsoft Azure Service using WizFi360, send data to cloud and monitor current status.
Data communication will be established as following.

MQTT AT Commands will be used to connect to IoT Hub Service & send data.
Data sent to IoT Hub will be saved in Blob Storage through Stream Analytics.
In this guide we will use WizFi360 to connect to Microsoft Azure Services using MQTT AT Command.
Step 1: Required items#
Items below are required for this guide.
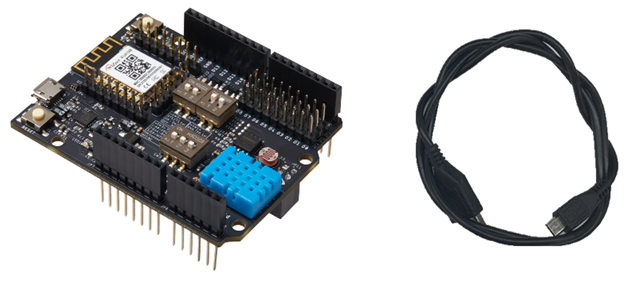
Hadrware#
Desktop or Laptop Computer
Micro 5 Pin USB Cable
Software#
- Preferred Serial Terminal (TeraTerm, Hercules, etc . . .)
Step 2: Device preparation#
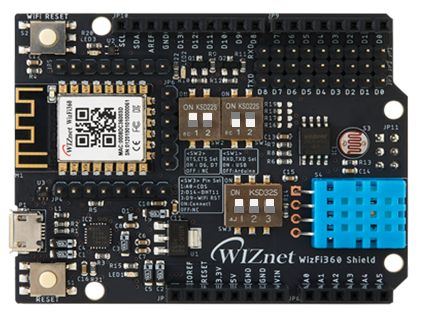
1. Hardware preparation#
WizFi360-EVB-Shield will be used in Standalone mode. Therefore DIP Switch and jumper cables shall be connected as following:
- SW1 : On
- SW2 : Off
- SW3 : Off
2. Device connection#
After connecting hardware, connect WizFi360-EVB-Shield to Desktop or Laptop using USB Cable.
Check COM Port from Device Manager.
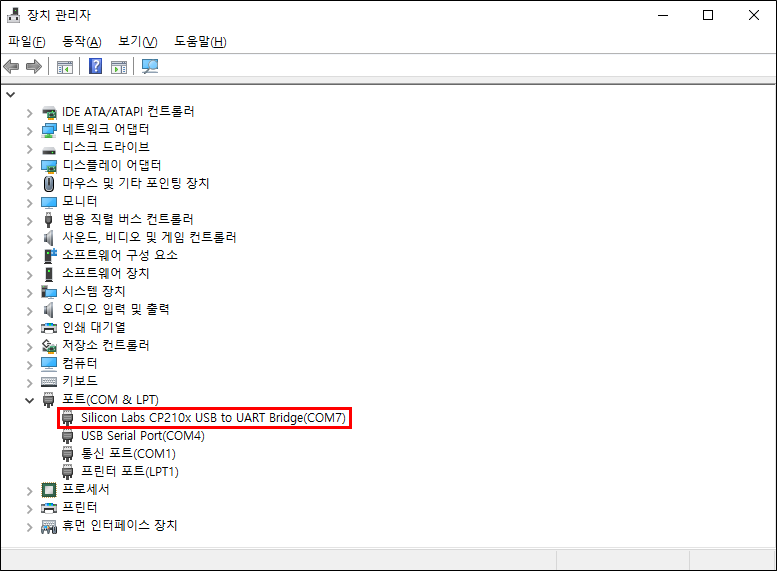
If COM port cannot be found in Device manager, check drivers from link below.
Step 3: Sample application#
To learn more about WizFi360 please refer to Quick Start Guide, AT Instruction Set.
1. Mode setting#
| Command | Response |
|---|---|
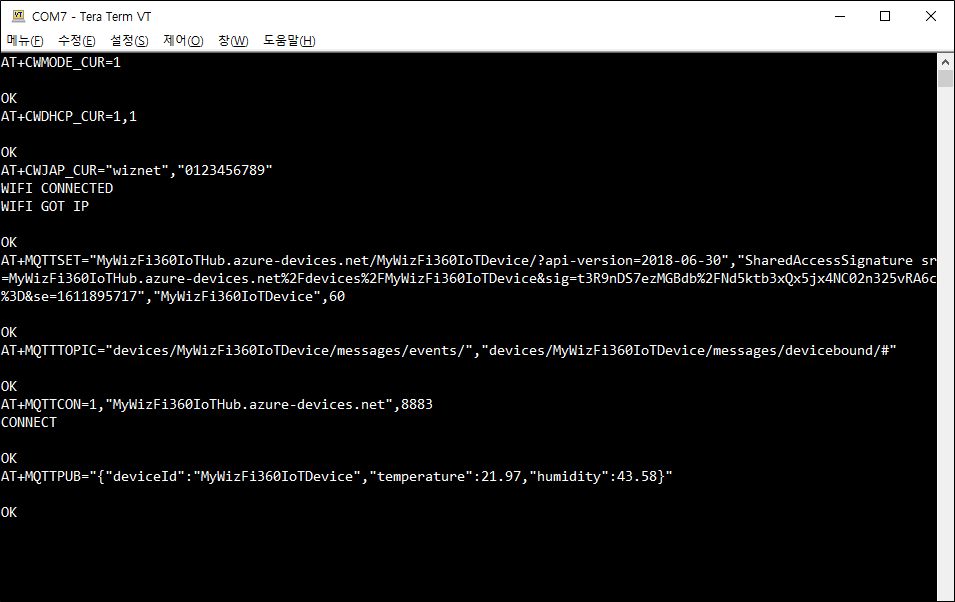
| AT+CWMODE_CUR=1 | OK |
2. DHCP setting#
| Command | Response |
|---|---|
| AT+CWDHCP_CUR=1,1 | OK |
3. Connect to AP#
| Command | Response |
|---|---|
| AT+CWJAP_CUR="ssid","password" Example : AT+CWJAP_CUR="wiznet","0123456789" | WIFI CONNECTED WIFI GOT IP OK |
4. MQTT Connection setting#
| Command | Response |
|---|---|
| AT+MQTTSET="iot_hub_host_name/device_id/?api-version=2018-06-30","sas_token","device_id",60 Example : AT+MQTTSET="MyWizFi360IoTHub.azure-devices.net/MyWizFi360IoTDevice/?api-version=2018-06-30","SharedAccessSignature sr=MyWizFi360IoTHub.azure-devices.net%2Fdevices%2FMyWizFi360IoTDevice&sig=t3R9nDS7ezMGBdb%2FNd5ktb3xQx5jx4NC02n325vRA6c%3D&se=1611895717","MyWizFi360IoTDevice",60 | OK |
For SAS Token creation please refer below.
5. Topic Setting#
| Command | Response |
|---|---|
| AT+MQTTTOPIC="devices/device_id/messages/events/",devices/device_id/messages/devicebound/# Example : AT+MQTTTOPIC="devices/MyWizFi360IoTDevice/messages/events/","devices/MyWizFi360IoTDevice/messages/devicebound/#" | OK |
6. Connect to Broker#
| Command | Response |
|---|---|
| AT+MQTTCON=1,"iot_hub_host_name",8883 Example : AT+MQTTCON=1,"MyWizFi360IoTHub.azure-devices.net",8883 | CONNECT OK |
7. Publish Message#
Note :
When publishing data, Start Stream Analytics to forward data to Blob Storage.
| Command | Response |
|---|---|
| AT+MQTTPUB="publish_data" Example : AT+MQTTPUB="{"deviceId":"MyWizFi360IoTDevice","temperature":21.97,"humidity":43.58}" | OK |
Step 4: Results#
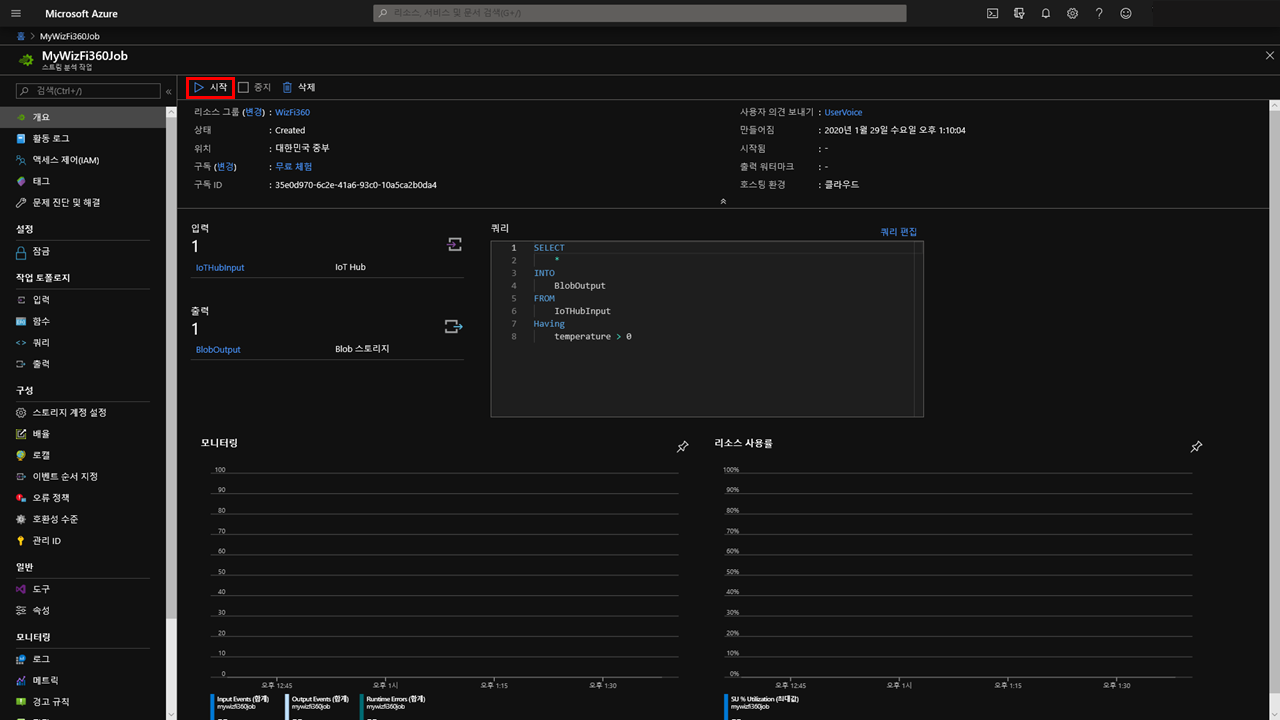
1. Start job in Stream Analytics#
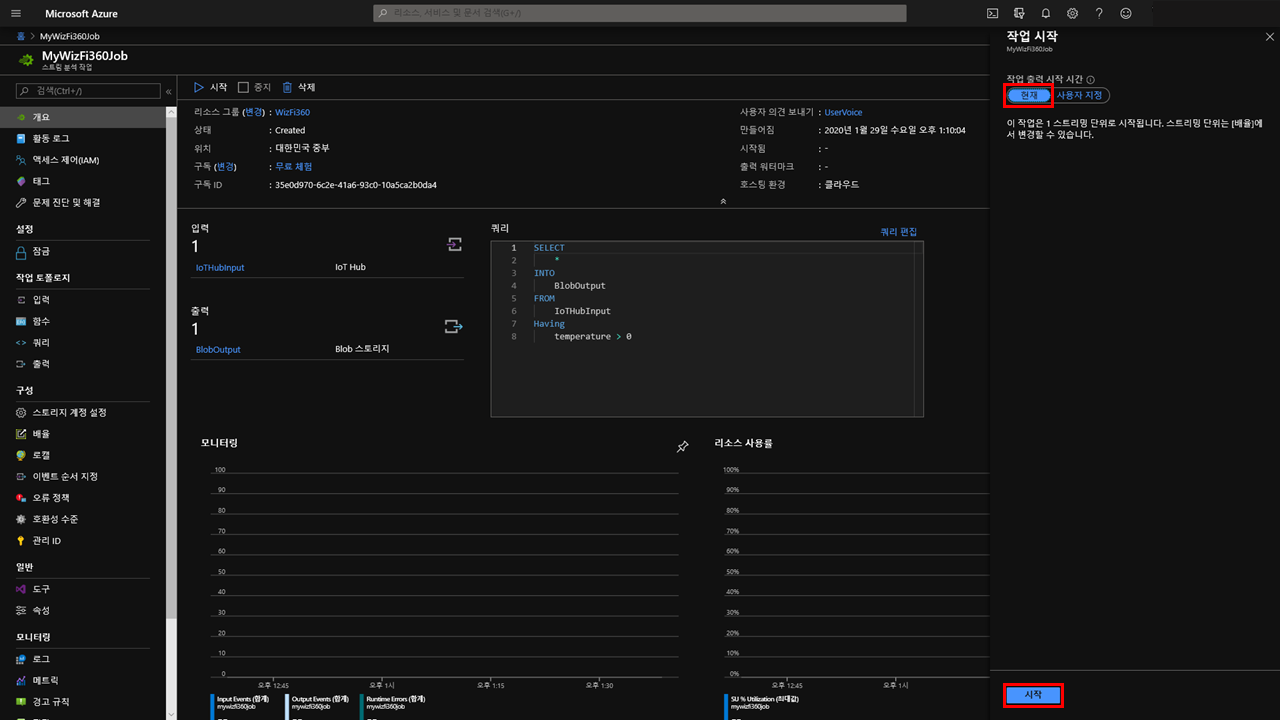
Select in Stream Analytics Introduction > Start > Current > Start.

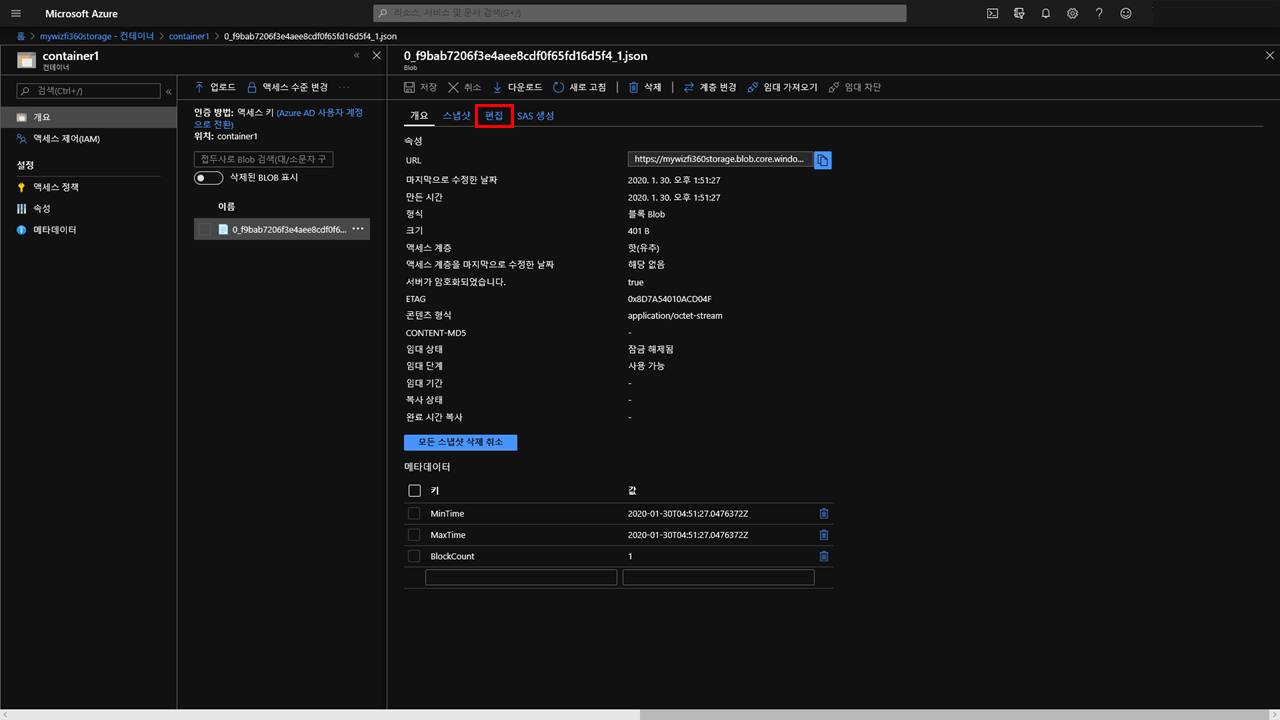
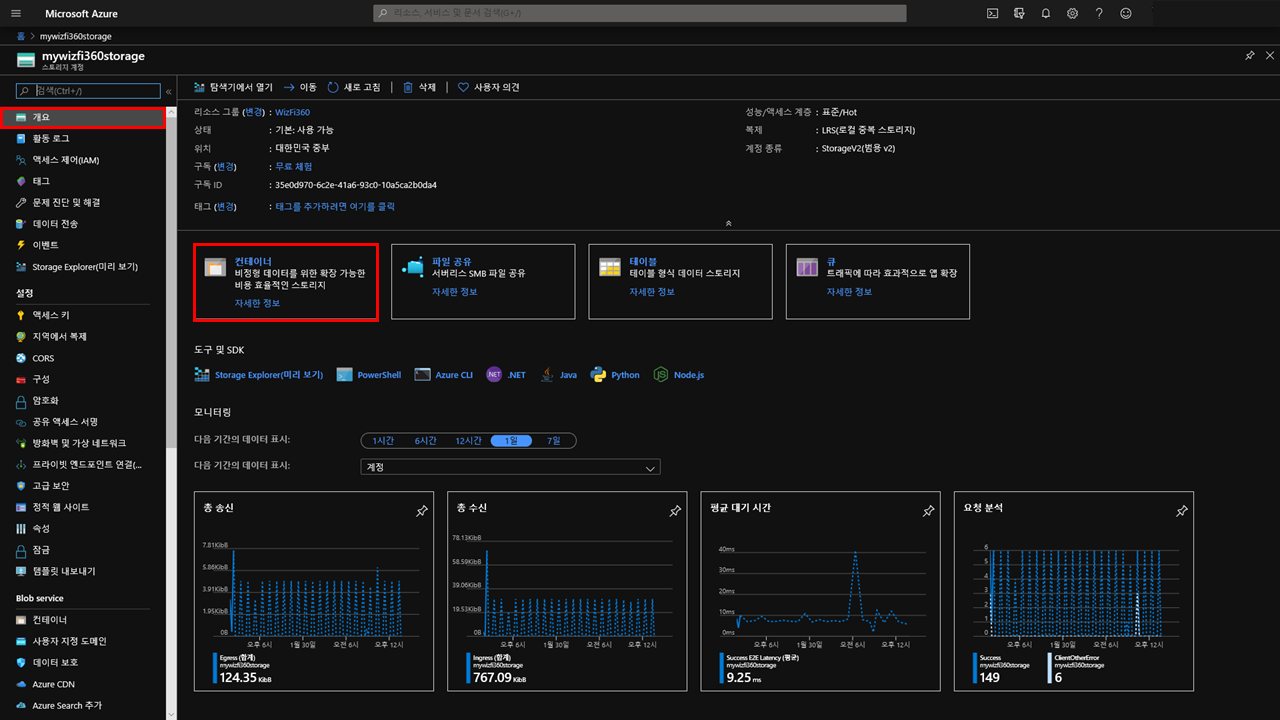
2. Check output#
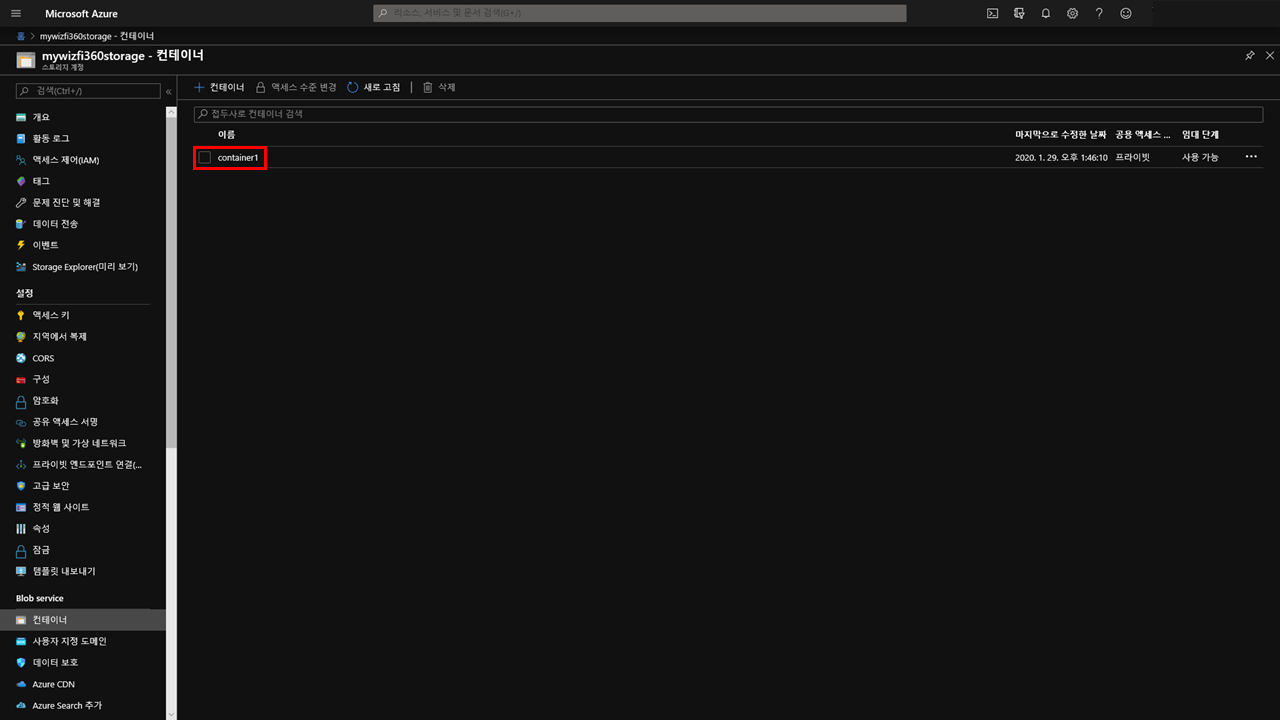
1) Select in Blob Storage Introduction > Container.
2) Select Container in List.
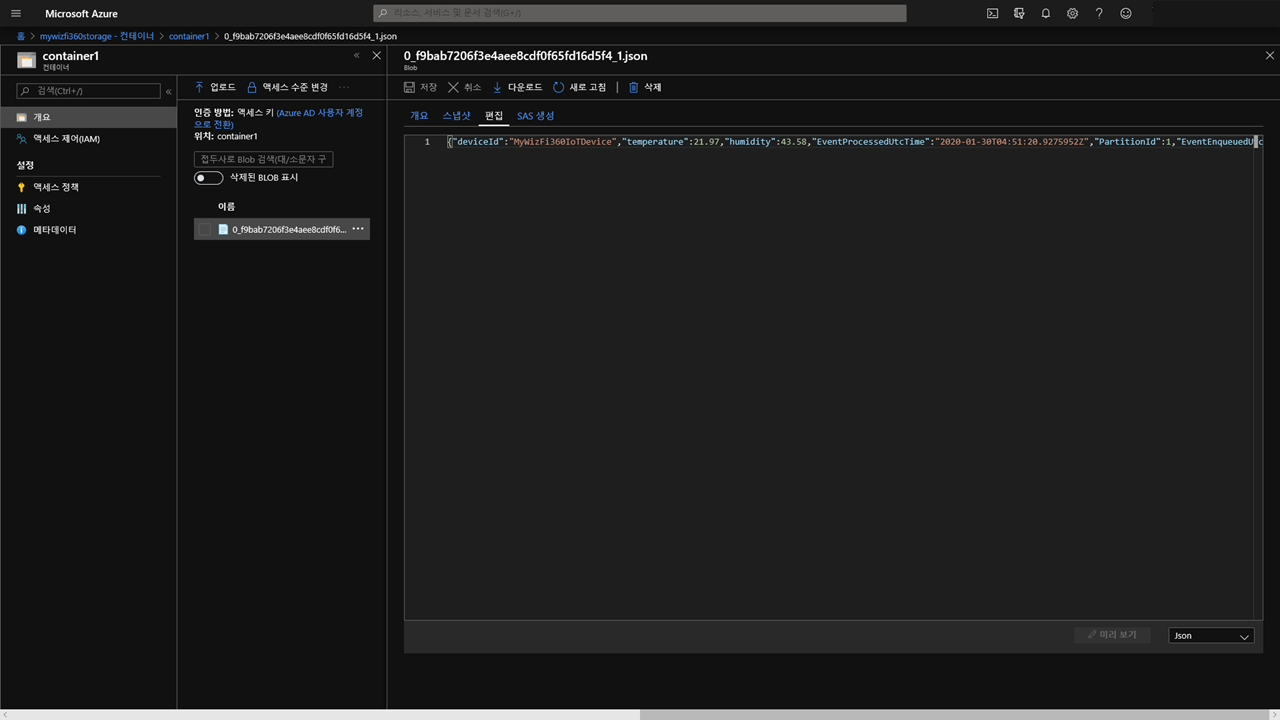
3) Select Blob in list.
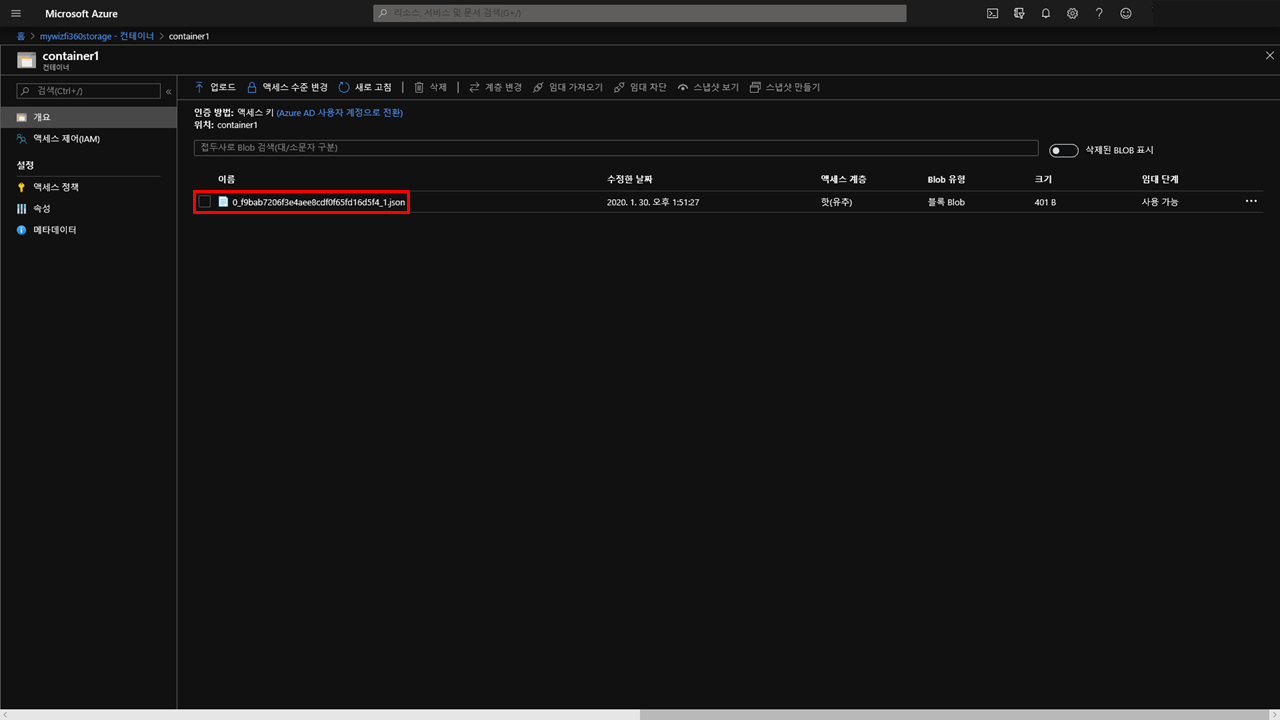
4) Click Edit to check data received from WizFi360.