Connect to Azure IoT Hub using Arduino Mega 2560 + WizFi360 Azure AT Command
Getting Started#
Hardware Requirement#
- Arduino Mega 2560 board
- Desktop or laptop computer
- USB cable
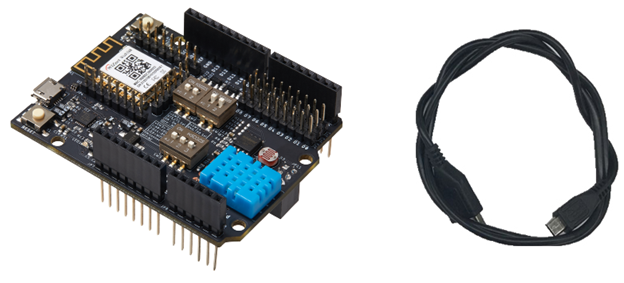
- WizFi360-EVB-Shield
Software Requirement#
- MS Azure Account (To create Azure account press here.)
- Preferred Serial Terminal (TeraTerm, YAT, etc.)
- Azure IoT Explorer
- Arduino IDE
Introduction#
Microsoft Azure is cloud computing service. Using WizFi360 we can connect to Azure services, transmit data and monitor status.
In this document we will guide how to connect Arduino Mega 2560 + WizFi360 to MS Azure Services. Thic process consists of following steps:
- Azure IoT Hub preparation
- IoT device registration
- Connect to Azure IoT and transmit data
For Azure IoT Hub setup and IoT device creation please refer to Azure Cloud Introduction.
For this guide WizFi360-EVB-Shield Evaluation board was used.
Device preparation#
Hardware configuration#
In this guide we will use Arduino Mega2560 and WizFi360-EVB-SHield. In Arduino Code we will use UART1 for ocmmunication with WizFi360-EVB-Shield. To do so we need to connect TX1, RX1 pins of Arduino board with RXD and TXD pins of WizFi360-EVB-Shield. Also, switch RXD/TXD Selector OFF in order to enable communication through pin not USB.
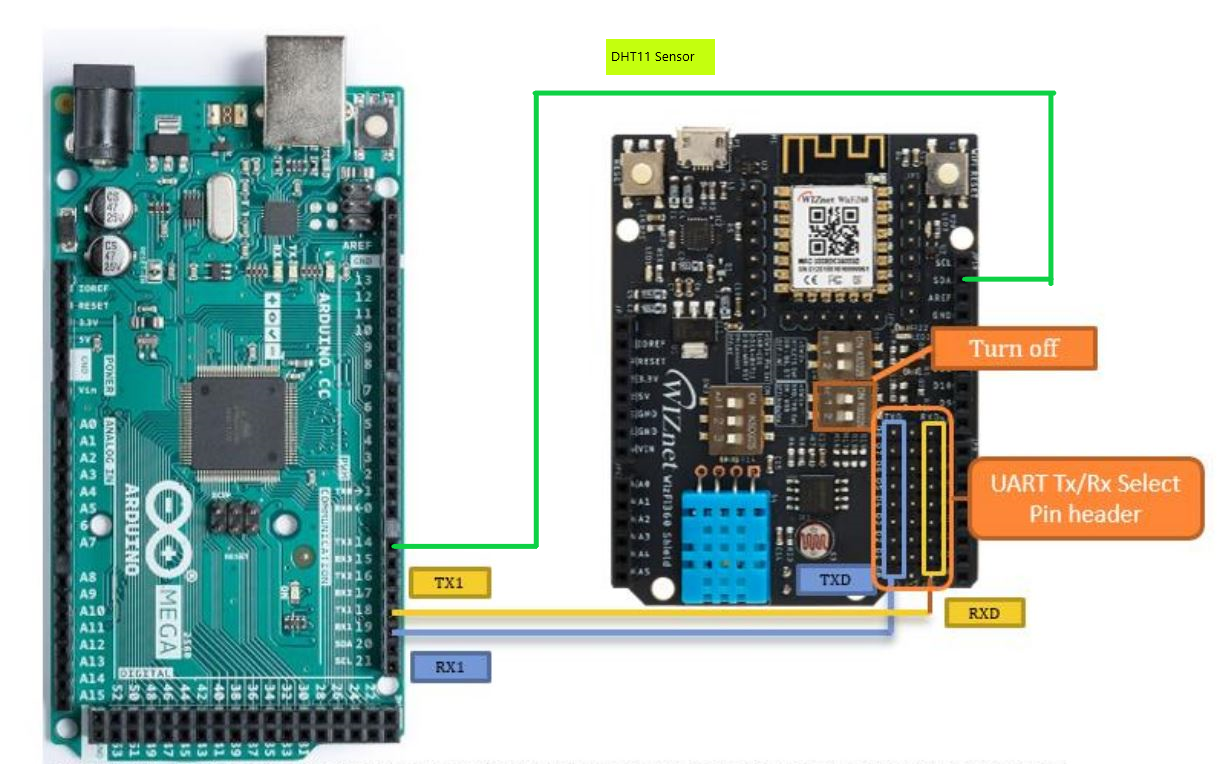
To use DHT11 sensor from WizFi360-EVB-Shield connect D14 pin on EVB board to D14 pin on Arduino Mega.
Device connection#
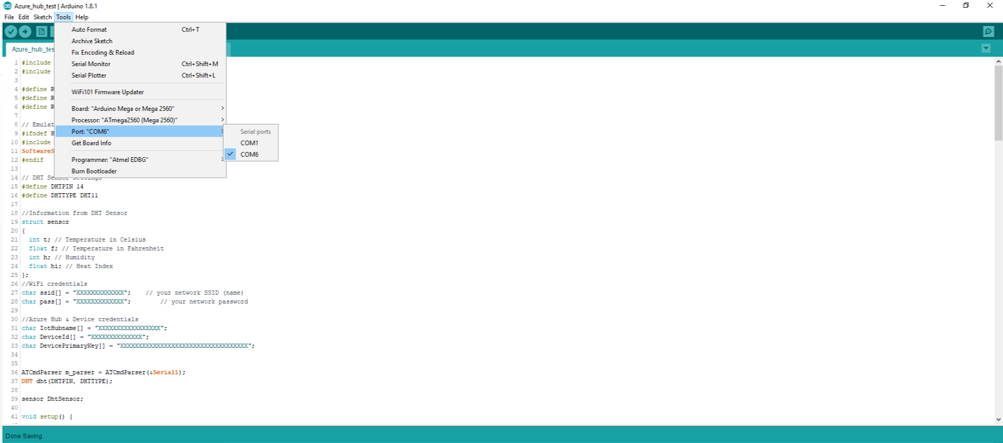
After configuring hardware connect Arduino Mega2560 board with PC. CHeck port number in Device Manager.
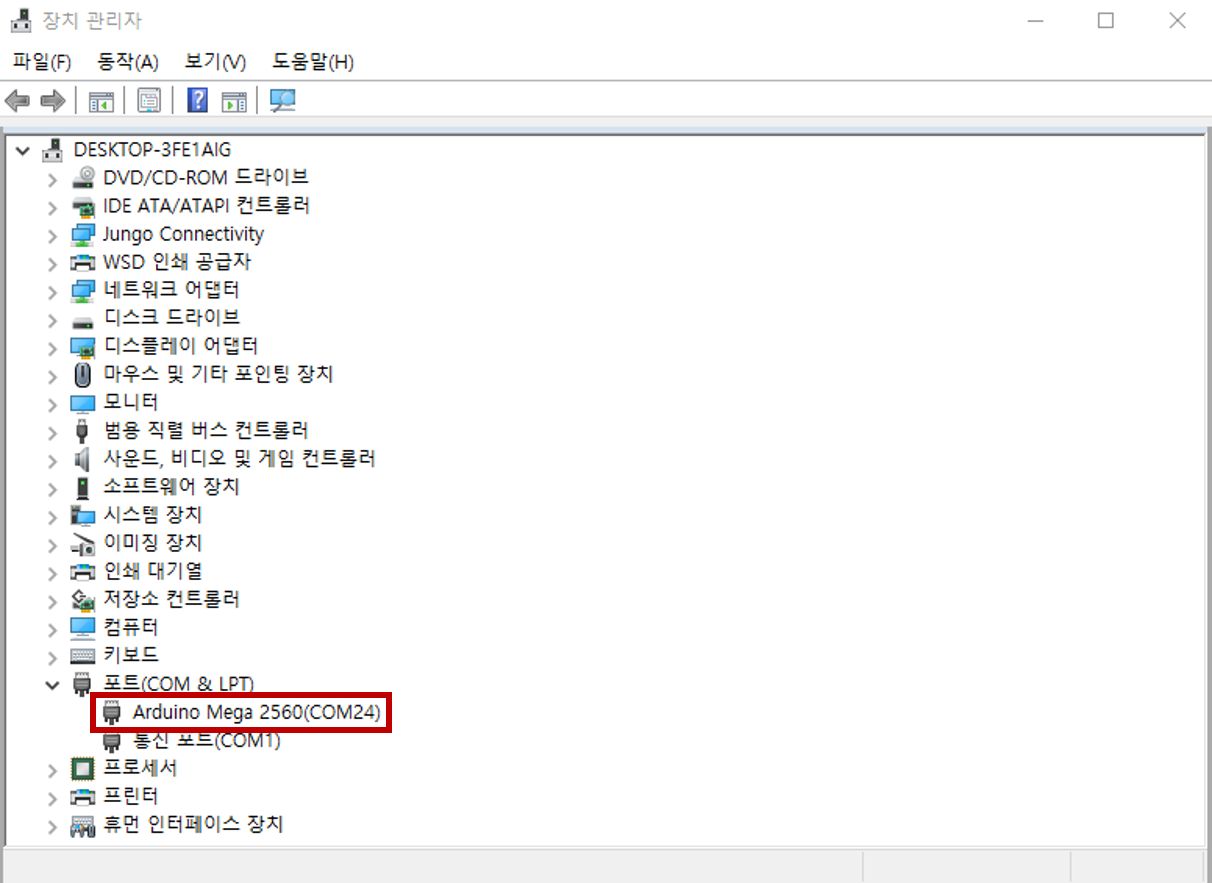
If everything setup correctly, then COM port can be checked in Device manager as shown on picture above.
AT Commands#
1. Set current WiFi mode (not saved in flash)#
AT Command: AT+CWMODE_CUR Syntax:
| Type | Command | Response |
|---|---|---|
| Query | AT+CWMODE_CUR? | +CWMODE:<mode> OK |
| Set | AT+CWMODE_CUR=<mode> | OK |
Defined values:
| Mode | Value |
|---|---|
| 1 | Station mode |
| 2 | SoftAP mode (factory default) |
| 3 | Station+SoftAP mode |
2. Enable DHCP#
AT Command: AT+CWDHCP_CUR Syntax:
| Type | Command | Response |
|---|---|---|
| Query | AT+CWDHCP_CUR? | +CWDHCP_CUR:<para> OK |
| Set | AT+CWMODE_CUR=<para>,<en> | OK |
Defined values:
| Parameter | Value |
|---|---|
| 0 | DIsable SoftAP DHCP & Station DHCP. |
| 1 | Enable SoftAP DHCP & Disable Station DHCP. |
| 2 | Disable SoftAP DHCP & enable Station DHCP. |
| 3 | Enable SoftAP DHCP & Station DHCP. (factory default) |
3. List available APs#
AT Command: AT+CWLAP Syntax:
| Type | Command | Response |
|---|---|---|
| Query | AT+CWLAP | +CWLAP:([<ecn>,<ssid>,<rssi>,<mac>,<channel>,<wps>]) |
Defined values:
| Parameter | Value |
|---|---|
| <ecn> | 0: Open 1: WEP 2: WPA_PSK 3: WPA2_PSK 4:WPA_WPA2_PSK |
| <ssid> | string parameter. AP의 ssid |
| <rssi> | signal strength |
| <mac> | string parameter. AP의 mac |
| <wps> | 0: Disable WPS 1: Enable WPS |
4. Connect to AP#
AT Command: AT+CWJAP_CUR Syntax:
| Type | Command | Response |
|---|---|---|
| Set | AT+CWJAP_CUR=<ssid>,<pwd>,[<bssid>] | +CWJAP_CUR:<ssid>,<bssid>,<channel>,<rssi> OK |
Defined values:
| Parameter | Value |
|---|---|
| <ssid> | string parameter. Target AP' ssid. MAX: 32 bytes |
| <pwd> | string parameter. Target AP' password. MAX: 64-byte ASCII |
| <bssid> | string parameter, target AP' MAC address, used in case if there are several APs with same SSID. |
5. Azure IoT Hub configuration set#
AT Command: AT+AZSET
Syntax:
| Type | Command | Response |
|---|---|---|
| Set | AT+AZSET=<iothub_name>,<device_id>,<device_key> | OK |
Defined values:
| Parameter | Value |
|---|---|
| <hub ID> | string parameter. IoT Hub ID |
| <device ID> | string parameter. IoT Device ID |
| <key> | string parameter, IoT Device Key |
6. Set MQTT Topic#
AT Command: AT+MQTTTOPIC
Syntax:
| Type | Command | Response |
|---|---|---|
| Set | AT+MQTTTOPIC=<publish topic>,<subscribe topic>,<subscribe topic2>,<subscribe topic3> | OK |
Defined values:
| Parameter | Value |
|---|---|
| <publish topic> | string parameter, topic where WizFi360 will publish |
| <subscribe topic> | string parameter, topic where WizFi360 will subscribe |
| <subscribe topic2> | string parameter, topic where WizFi360 will subscribe |
| <subscribe topic3> | string parameter, topic where WizFi360 will subscribe |
Note:
- This command shall be set before connecting to broker.
- <subscribe topic2> & <subscribe topic3> are available in Firmware v1.0.5.0 and later.
7. Connect to Azure#
AT Command: AT+AZCON
Syntax:
| Type | Command | Response |
|---|---|---|
| Set | AT+AZCON | CONNECT OK |
Note: • Before sending this ocmmand, AT+AZSET command & AT+MQTTTOPIC command shall be set. • After connection data can be sent to Azure server using AT+MQTTPUB command. • For more details please refer to https://docs.microsoft.com/en-us/azure/iot-hub/iot-hub-mqtt-support.
8. Publish a message#
AT Command: AT+MQTTPUB
Syntax:
| Type | Command | Response |
|---|---|---|
| Set | AT+MQTTPUB=<message> | OK |
Note: • This command shall be used when MQTT connection is established. • Topic where data will be published is set with AT+MQTTTOPIC command, user shall define topic before connecting to broker.
Running sample code#
Download sample Arduino code#
Please download Arduino sample code from link below and open ino project file.
Sample can be found at below path.
samples/Wi-Fi/Arduino_Azure_Atcmd_Wizfi360
Modify parameters#
Update your credentials (WiFi ssid, WiFi pwd, Hub ID, Device ID, Device Key) in order to connect to Azure IoT Hub.
As shown on below picture, check your board & port, then compile code.
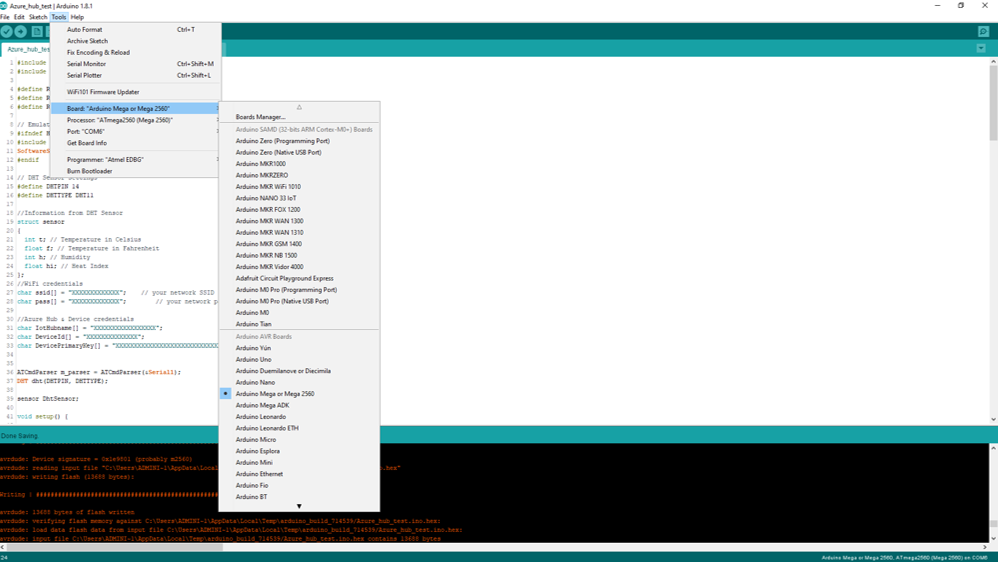
When compile is done, upload to board. When upload is done, you will see 'avrdude done. Thank you.' message.

Use Serial monitor to check if code was successfully uploaded to Adruino Mega2560 board.

Results#
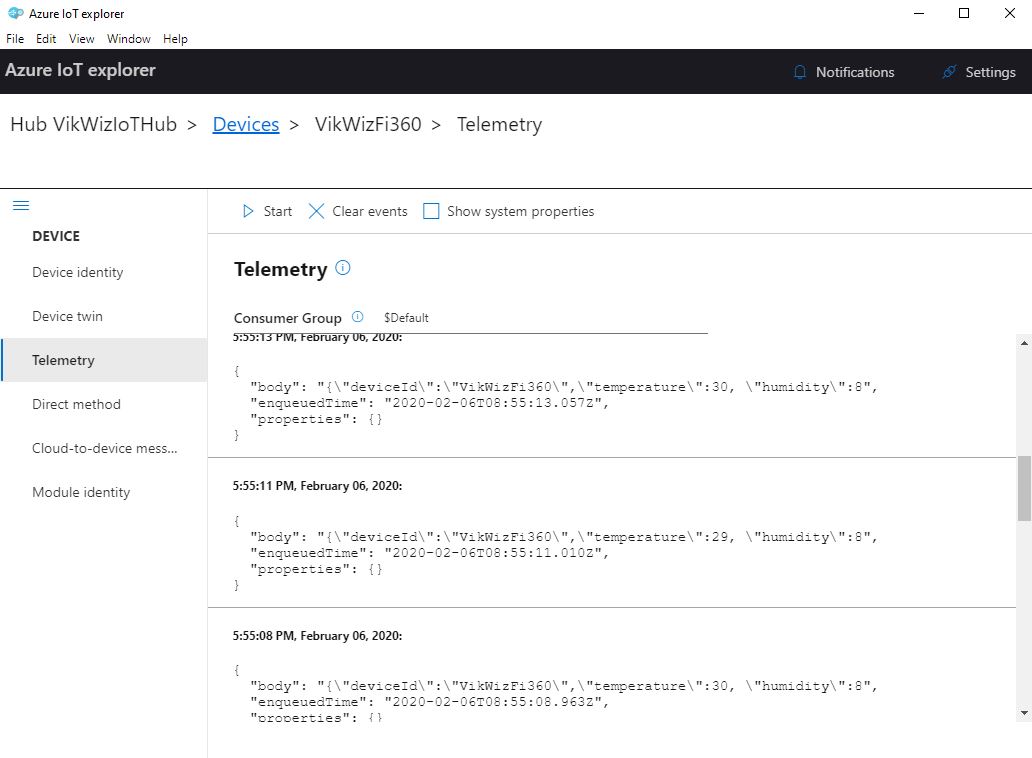
- Press "Start" button in Telemetry Section in IoT Hub Explorer.
"Start" button shall be pressed before sending data using MQTTPUB commands.
- Check data sent with MQTTPUB command.