Connect to Azure IoT Hub using WizFi360 MQTT AT Command
Getting started#
Login to Azure Portal.
※ In this guide we will procedd with free account. To learn how to create IoT Hub please refer to Azure Cloud Service Introduction.
Introduction#
It is possible to connect to Microsoft Azure Service using WizFi360, send data to cloud and monitor current status.
Data communication will be established as following.

MQTT AT Commands will be used to connect to IoT Hub Service & send data.
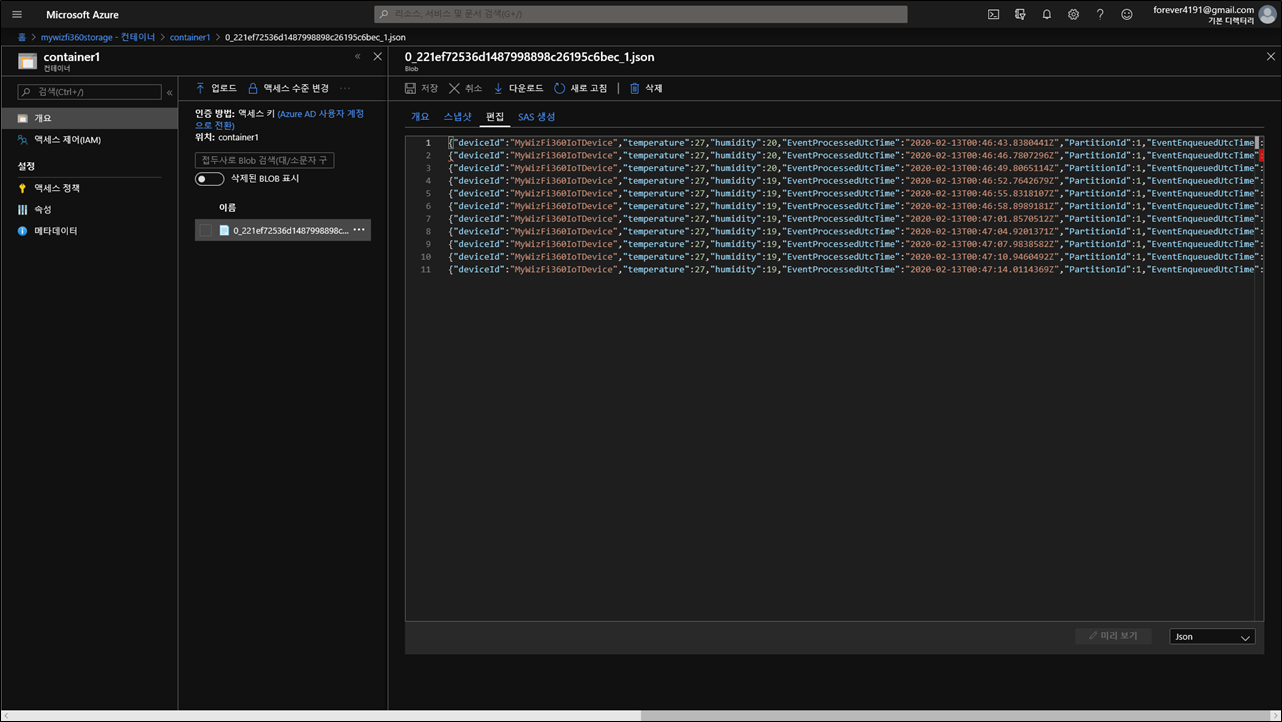
Data sent to IoT Hub will be saved in Blob Storage through Stream Analytics.
In this guide we will use WizFi360 with Arduino to connect to Microsoft Azure Services using MQTT AT Command.
Step 1: Required items#
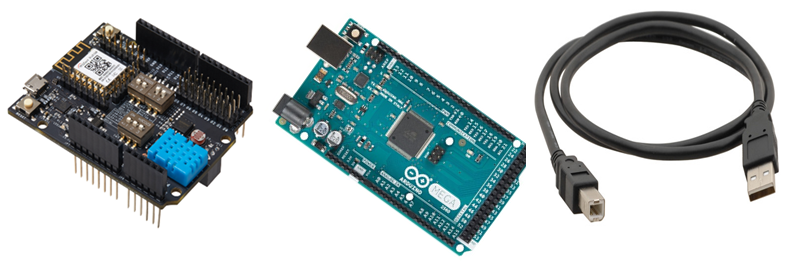
Items below are required for this guide.
Hadrware#
Desktop or Laptop Computer
USB Type-B Cable
Software#
- Arduino IDE
- Preferred Serial Terminal (TeraTerm, Hercules, etc . . .)
Step 2: Device preparation#
1. Hardware preparation#
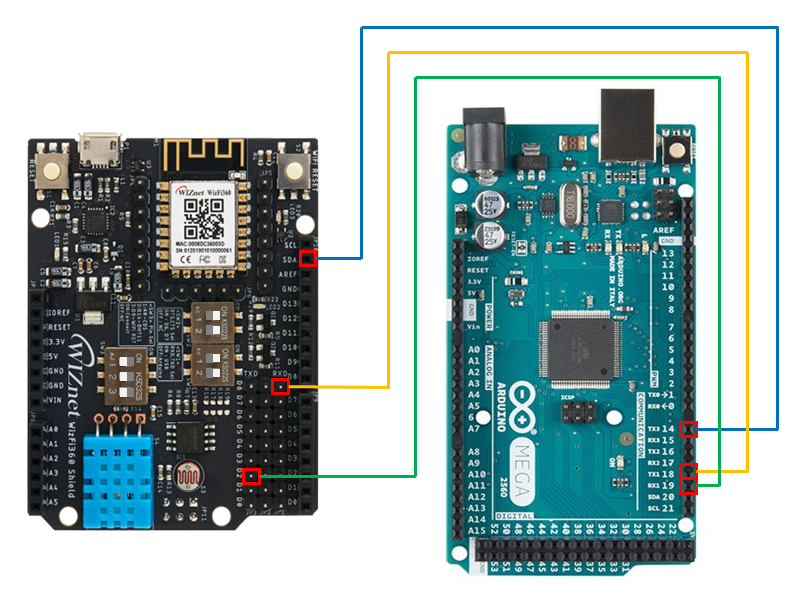
WizFi360-EVB-Shield will be installed on top of Arduino Mega 2560. Therefore DIP Switch and jumper cables shall be connected as following:
- SW1 : Off
- SW2 : Off
- SW3 : On
- WizFi360-EVB-Shield : D8 - Arduino Mega 2560 : 18
- WizFi360-EVB-Shield : D2 - Arduino Mega 2560 : 19
- WizFi360-EVB-Shield : SDA - Arduino Mega 2560 : 14
2. Device connection#
After connecting hardware, connect Arduino Mega2560 to Desktop or Laptop using USB Type-B Cable.
Check COM Port from Device Manager.
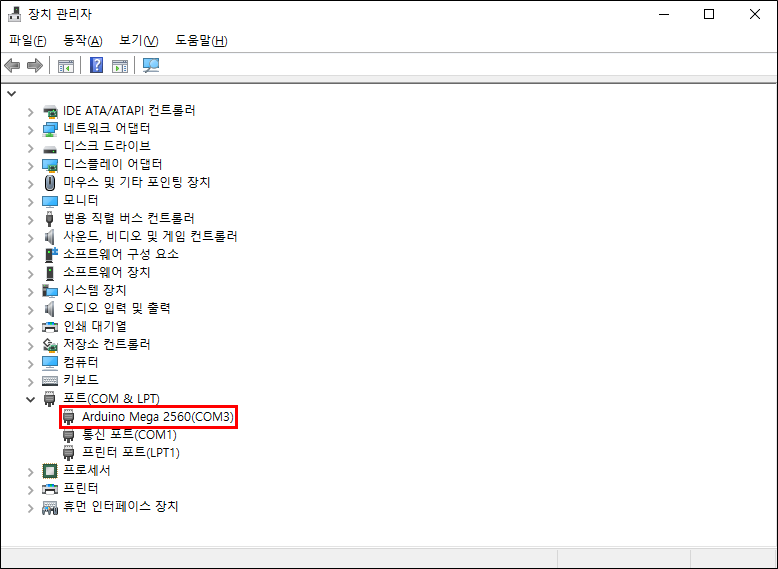
Please check port number in Arduino IDE as shown on picture above.
If COM port cannot be found in Device manager, check link below and follow instructions.
Step 3: Sample application#
1. Code Download & Execution#
After Code Download open .ino Project.
Sample code is stored in following path.
- samples/Wi-Fi/Arduino_Mqtt_Atcmd_Wizfi360
2. Parameter update#
To connect to Azure IoT Hub, update next parameters.

For SAS Token creation refer to below.
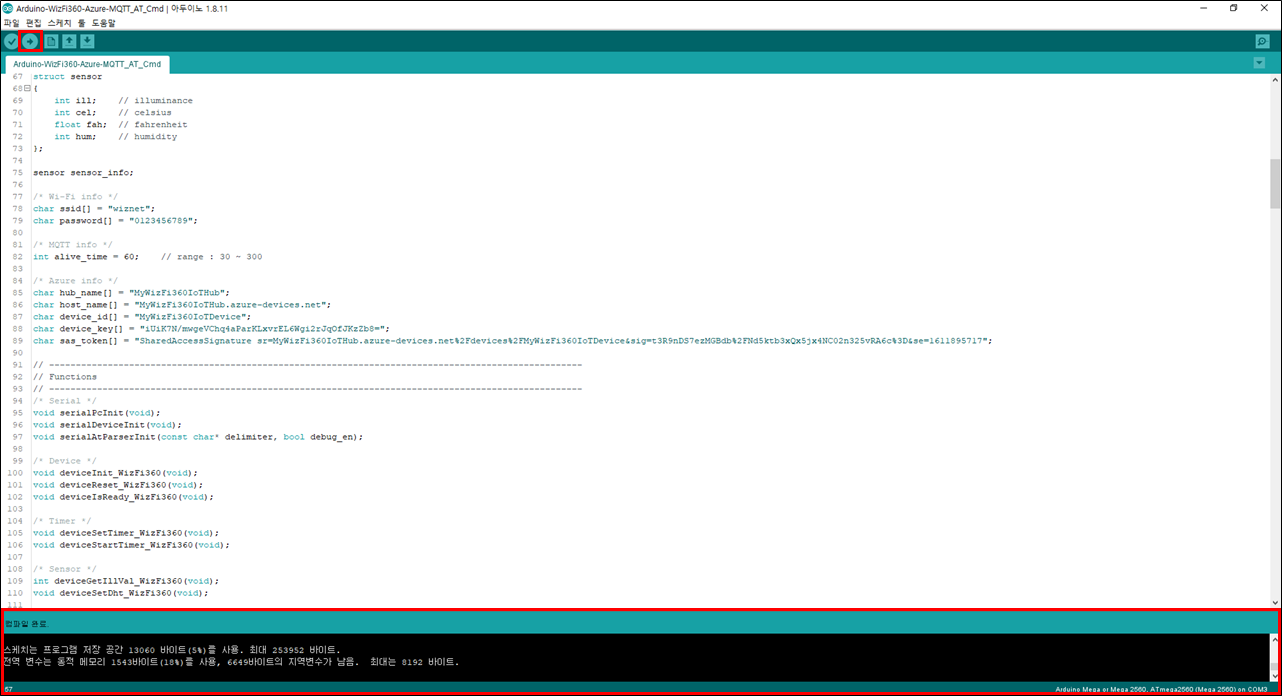
3. Project Compile & Upload#
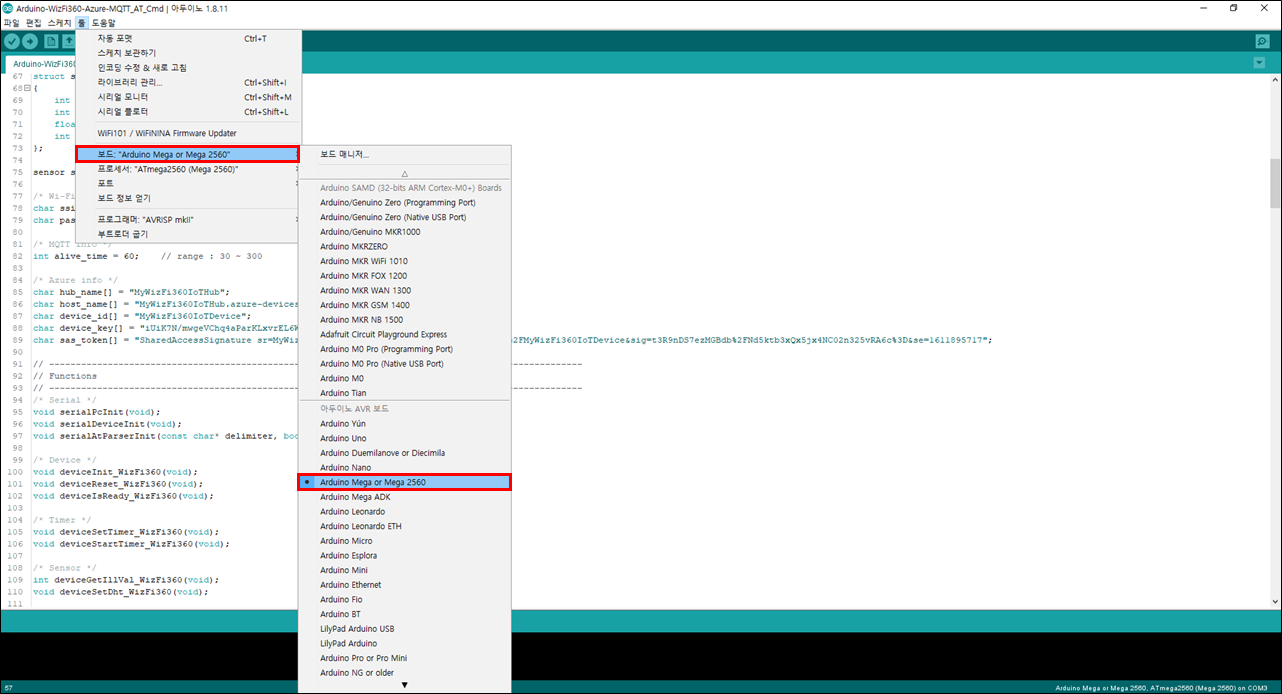
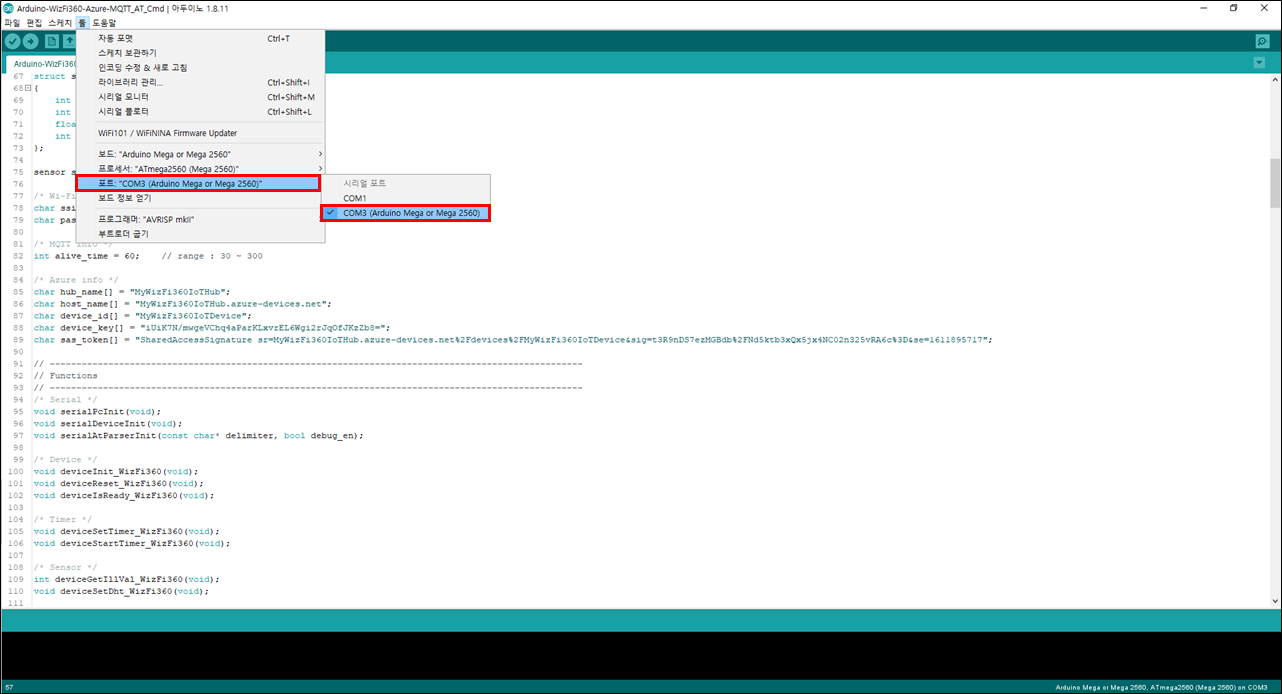
Select corresponding Board, COM Port, then Compile & Upload.
Note :
Start Stream Analytics in order to forward data to Blob Storage.
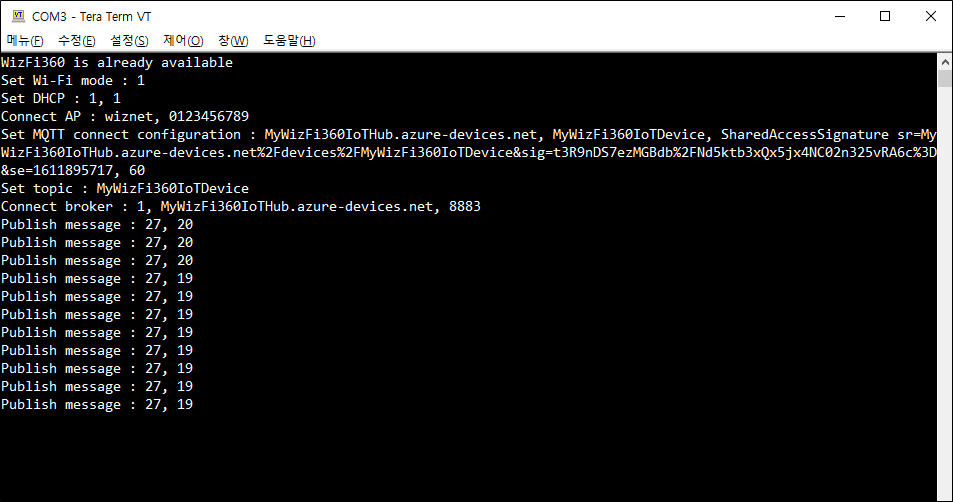
Step 4: Results#
In terminal program we can check data sent from WizFi360 to Azure IoT Hub. In Blob Storage we can check received data.