Connect WizFi360 to AWS IoT using AT Command
Getting Started#
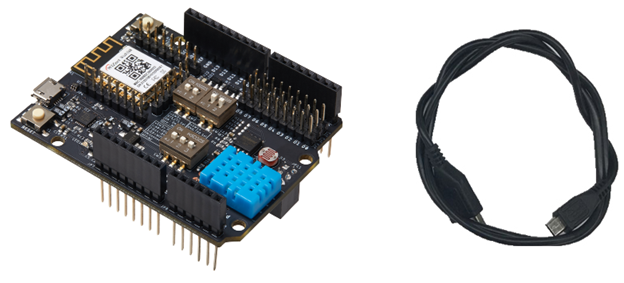
Hardware Requirement#
- Desktop or laptop computer
- MicroUSB cable
- WizFi360-EVB-Shield
Software Requirement#
- Preferred Serial Terminal (TeraTerm, YAT, etc.)
- AWS Console account
- Firmware v. 1.1.0.595 was used in this guide. Please contact us to receive this version.
AWS IoT Core preparation before start
- Sign to console
- Create a thing
- Create a policy
important
Save certificates and key during creation.
 AWS root CA can be downloaded from here
Introduction#
AWS IoT provides secure, bi-directional communication between Internet-connected devices such as sensors, actuators, embedded micro-controllers, or smart appliances and the AWS Cloud. It is possible to connect to AWS via WizFi360 and send data using MQTT.
In this document we will provide guide how to connect to AWS services. Process consists of following steps:
- Creation of AWS account
- Creation & configuration of Thing in IoT Core
- Connection & Message transfer
For this guide we used evaluation board WizFi360-EVB-Shield
Device preparation#
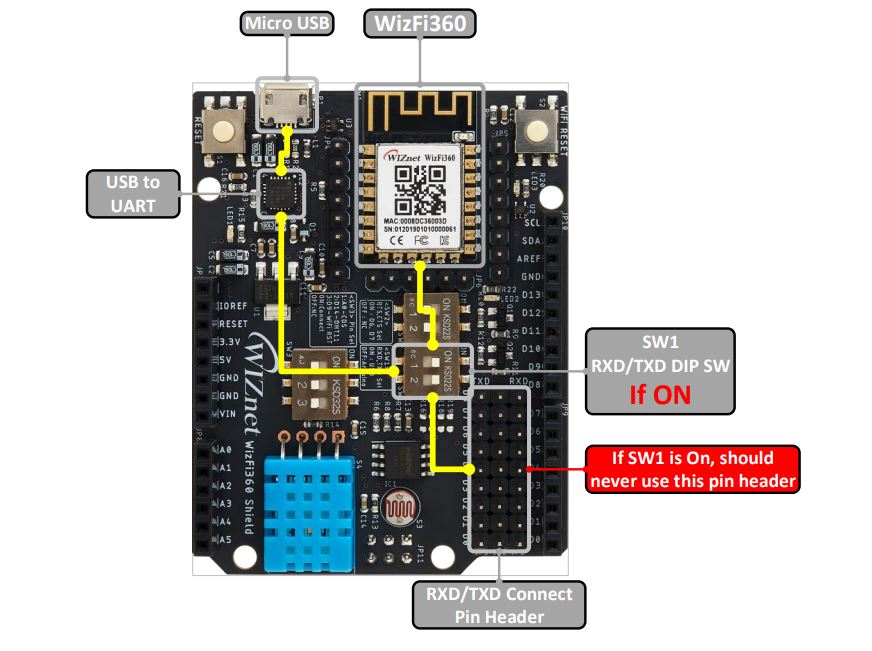
Hardware setting#
We are going to use WizFi360-EVB-Shield in standalone mode. MicroUSB cable will be used to connect through UART. Switch SW1 into ON position and connect MicroUSB.
Device connection#
Please check COM port number in Device Manager.
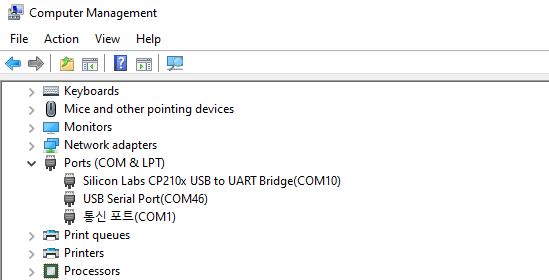
tip
If COM port cannot be found in Device Manager, please install drivers below.
AT Commands Description#
Please refer to AT Instruction Set to find information about all AT Commands. Below we will describe commands created for AWS connection.
1. Set SSL Certificate#
AT Command: AT+CASEND
Syntax:
| Type | Command | Response |
|---|---|---|
| Set | AT+CASEND=<parameter> | OK |
Defined values:
| Parameter | Value |
|---|---|
| <parameter> | 0: delete certificate 1: generate certificate |
In order to check current certificate enter command AT+CASEND?
2. Set Private Key#
AT Command: AT+AWSPKSEND
Syntax:
| Type | Command | Response |
|---|---|---|
| Set | AT+AWSPKSEND=<parameter> | OK |
Defined values:
| Parameter | Value |
|---|---|
| <parameter> | 0: delete private key 1: save new private key |
In order to check current key enter command AT+AWSPKSEND?
3. Set Certificate for Thing#
AT Command: AT+CLICASEND
Syntax:
| Type | Command | Response |
|---|---|---|
| Set | AT+CLICASEND=<parameter> | OK |
Defined values:
| Parameter | Value |
|---|---|
| <parameter> | 0: delete Certificate 1: save new certificate for Thing |
In order to check current certificate enter command AT+CLICASEND?
4. Connect to AWS#
AT Command: AT+AWSCON
Syntax:
| Type | Command | Response |
|---|---|---|
| Set | AT+AWSCON="<Thing ARN>" | CONNECT OK |
important
Before connection to AWS certificates, MQTTTOPIC and MQTTSET shall be set.
Otherwise AT+AWSCON will return error.
Please note that AWSCON will return error when CIPMUX is set to 1.
Connection procedure#
Connect your device and launch terminal#
For connection use following configuration in terminal: 115200-8-N-1, None.
Connect WizFi360 to WiFi#
Enter Certificate#
When saving certificate or private key, all lines shall be sent one by one from "Begin certificate" line till "End certificate" line.
Please refer to below image.

Connection to AWS#
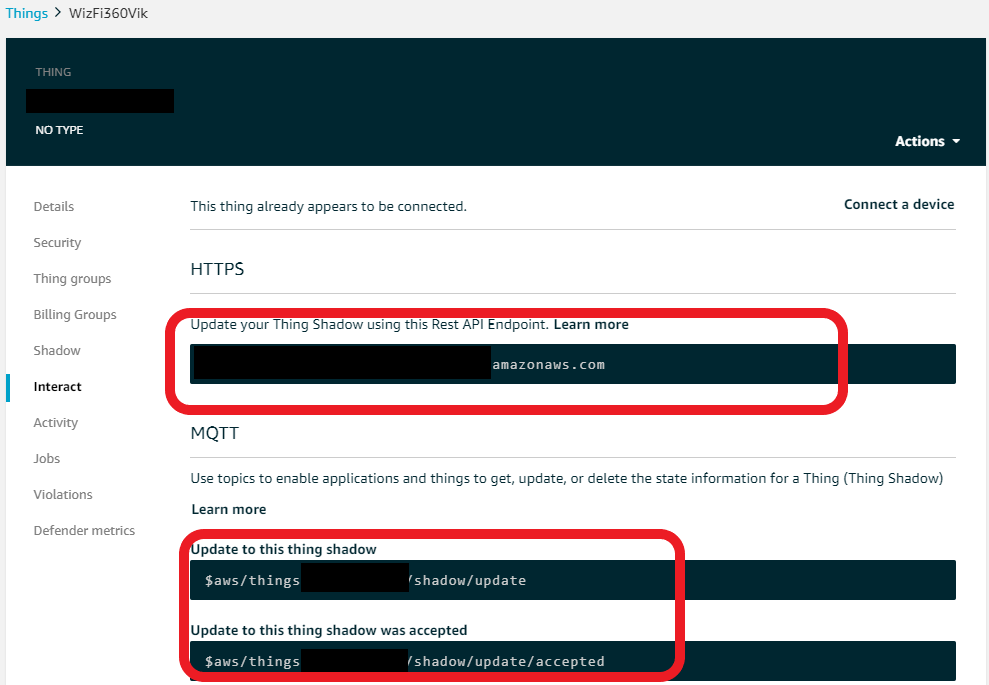
Can't find shadow links & Rest API endpoint? (Click here)
tip
Go to AWS IoT -> Manage -> Things -> Your thing -> Interact menu.
Check screenshot below.
Below is screenshot from terminal
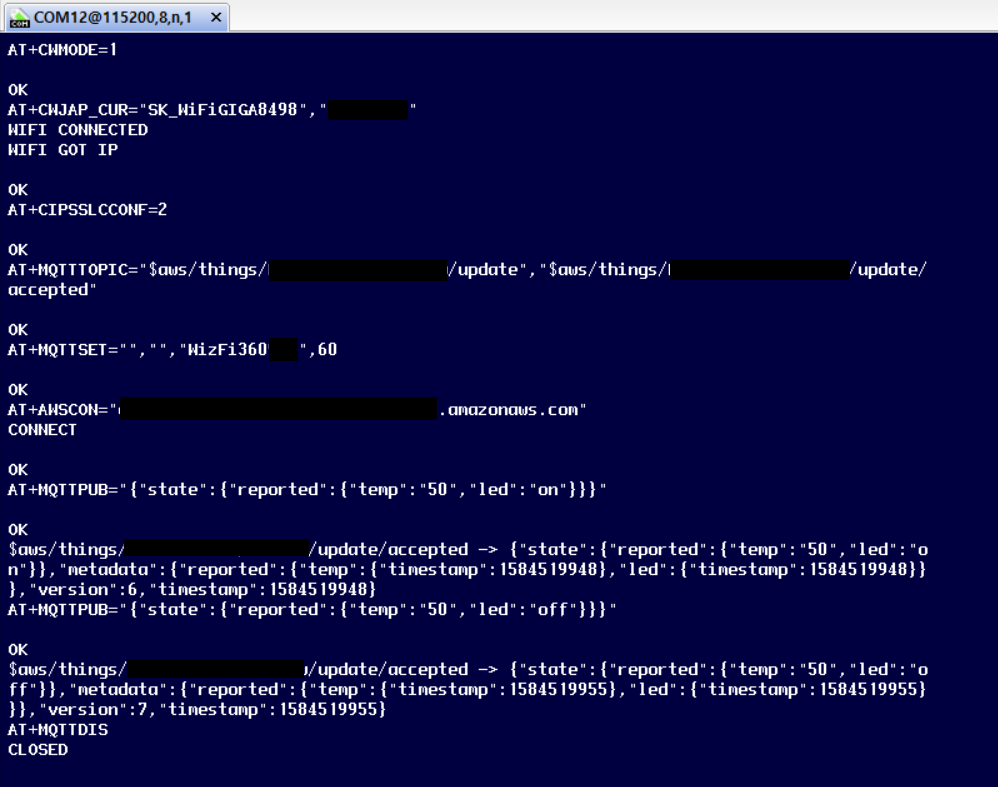
Results#
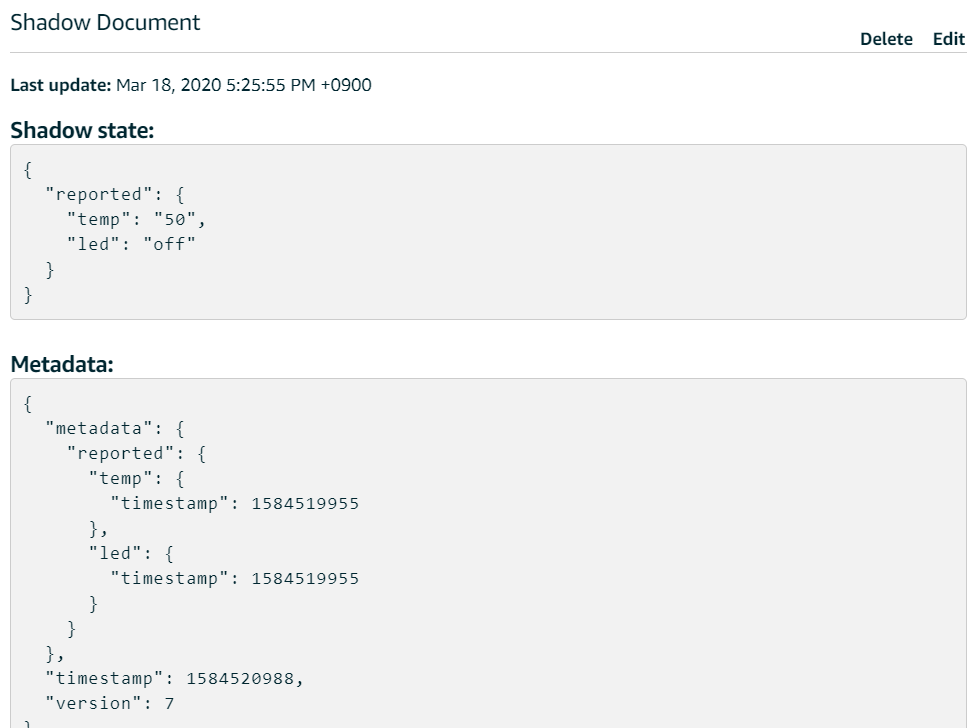
- Results can be checked in AWS -> AWS IoT -> Manage -> Things -> Shadow.
- Since we subscribed to "updated" topic, when MQTT message is sent we can see reply message instantly.
Congratulations
WizFi360 is successfully connected to AWS!