Quickstart Guide
Environment setting#
There are two types of WizFi360-EVB, which can be classified as ‘Shield’ and ‘Mini’ versions. WizFi360 is controlled by sending AT command through UART. WizFi360-EVB-Mini and WizFi360-EVB-Shield uses UART1 by connecting Micro USB.
| WizFi360-EVB-Mini | WizFi360-EVB-Shield |
|---|---|
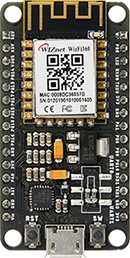 | 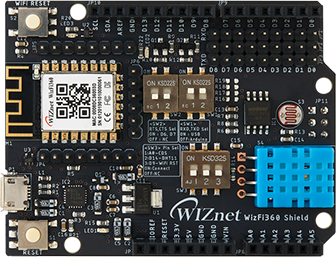 |
In addition, WizFi360-EVB-Shield is Pin compatible with Arduino. So you can use UART in two cases. If you use Micro USB, turn SW1 ON and connect Micro USB. In case of using Arduino H/W compatible pin, turn SW1 OFF and select RXD / TXD pin for Arduino using jumper cap. See the figure below.
| Micro USB | Arduino H/W compatible pin |
|---|---|
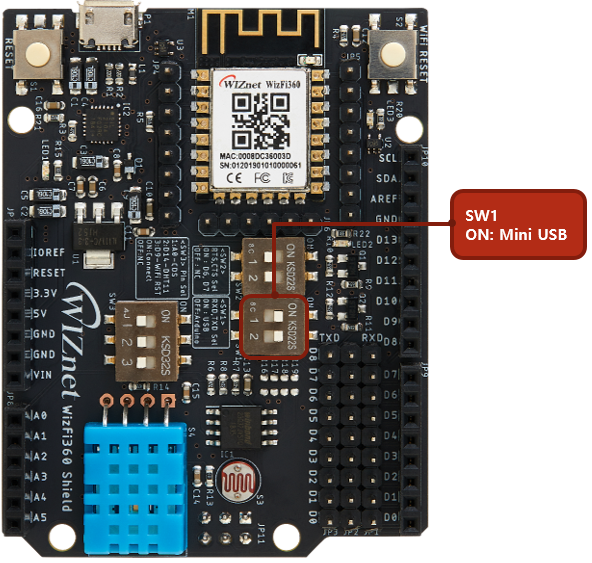 | 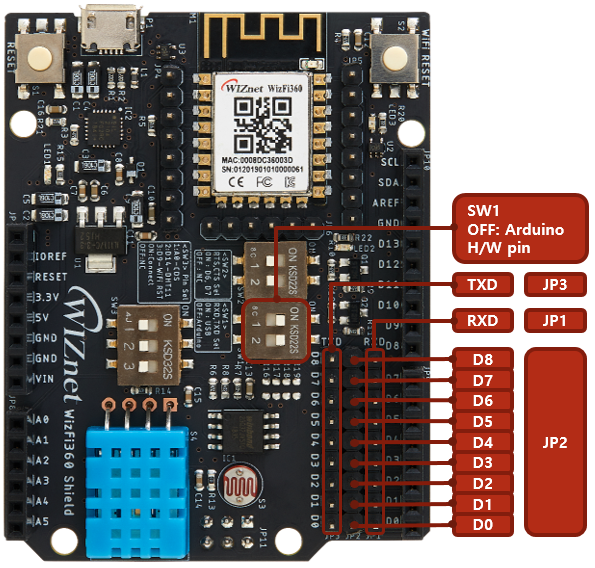 |
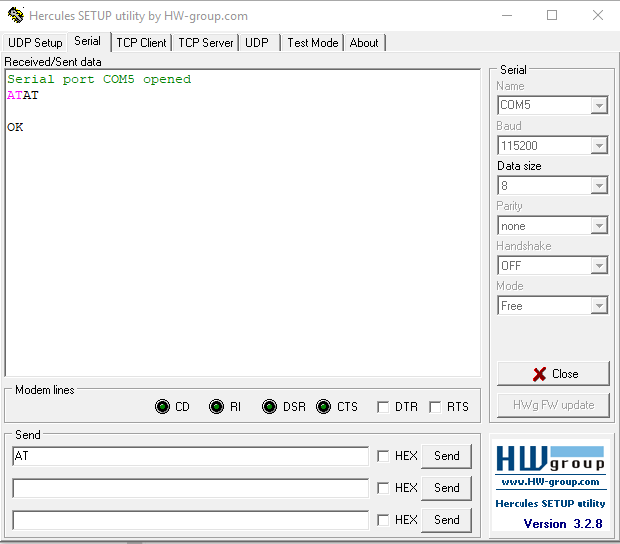
If WizFi360-EVB-Shield or WizFi360-EVB-Mini is connected to a PC with a Mini USB Cable, run the serial program for UART communication on the PC. Open Port in Serial Program and input AT. If WizFi360 return OK, AT command can be used.
TCP CLient Example#
A brief AT command describe for operating of WizFi360 as TCP Client in single connection mode. If you need AT command example of another mode, see the documentation called "AT command examples"
Open TCP Server from PC which is connected to the same WiFi AP that WizFi360 is connected to. (IP : 192.168.10.100 Port : 5000)
important
In normal transmission mode, there are three commands to send data. (For more details, refer to AT Instruction set.)
- AT+CIPSEND
- AT+CIPSENDBUF
- AT+CIPSENDEX
In AT+CIPSEND and AT+CIPSENDEX, If the data is entered more than the length set (n) :
- the system will send the first n bytes and discard exceeded data.
In AT+CIPSENDBUF, If the data is entered more than the length set (n) :
- the system will reply busy and send the first n bytes
- and discard exceeded data.